When troubleshooting refrigerator problems, there are several common issues that you can check for before calling a professional. Here are some steps you can take to diagnose and potentially fix the problem:
Check the power supply: Make sure the refrigerator is properly plugged in and that the power outlet is functioning. Test the outlet with another device to ensure it’s working.
Adjust the temperature settings: If the refrigerator is not cooling properly, check the temperature settings. Make sure they are set correctly and adjust if needed.
Clean the condenser coils: Over time, dust and debris can accumulate on the condenser coils, hindering their ability to dissipate heat. Use a vacuum cleaner or a brush to gently clean the coils.
Check the door seals: Damaged or loose door seals can cause warm air to enter the refrigerator, resulting in poor cooling. Inspect the seals and replace them if necessary.
Clear any obstructions: Ensure that there are no items blocking the vents inside the refrigerator. Proper air circulation is crucial for efficient cooling.
Verify the fan operation: The refrigerator has a fan that circulates cold air throughout the unit. Listen for the sound of the fan running. If it’s not working, it may need to be replaced.
Defrost the freezer: If the freezer is not maintaining a consistent temperature, there may be a frost buildup. Unplug the refrigerator and allow the freezer to defrost completely before plugging it back in.
Monitor for unusual noises: Pay attention to any unusual noises coming from the refrigerator. Grinding, buzzing, or rattling sounds could indicate a mechanical issue that requires professional attention.
If you have tried these troubleshooting steps and the problem persists, it’s recommended to contact a qualified appliance technician for further assistance. They will have the expertise to diagnose and repair more complex issues with your refrigerator.
When it comes to troubleshooting freezer problems, there are several common issues that you can address on your own before calling a professional. Here are some tips to help you diagnose and potentially fix the problem:
Ice or frost buildup: If you notice a significant amount of ice or frost inside the freezer, it could indicate a faulty defrost timer, thermostat, or defrost heater. Check these components and replace them if necessary.
Leaking water: If you find water pooling inside or around the freezer, check for a clogged or frozen defrost drain. Clear the drain using a turkey baster or hot water to restore proper drainage.
Insufficient cooling: If your freezer is not cooling properly, ensure that the temperature settings are correct. Clean the condenser coils at the back of the freezer to remove dust and debris, as this can affect cooling performance.
Strange noises: Unusual noises coming from the freezer can point to various issues. Check the evaporator fan motor and blades for any obstructions or damage. If necessary, clean or replace the fan motor.
Failure to turn on: If your freezer does not turn on at all, check the power supply. Make sure the freezer is properly plugged in and that the circuit breaker or fuse is not tripped. Test the power outlet for voltage.
It’s important to note that these troubleshooting steps may vary depending on the specific make and model of your freezer. Consult your appliance’s manual or the manufacturer’s website for more detailed instructions tailored to your unit.
If you’re experiencing issues with your wine cooler not cooling properly, there are several troubleshooting steps you can take before seeking professional assistance. Here are some common problems and their potential solutions:
Room temperature is too warm: Ensure that the room where your wine cooler is located is at an appropriate temperature. Wine coolers are designed to work within a specific temperature range, typically between 55°F and 65°F (12°C and 18°C). Excessive heat can hinder cooling performance.
Improper ventilation: Check that the wine cooler has adequate ventilation space around it. Proper airflow is essential for efficient cooling. Remove any obstructions or debris that may be blocking the vents.
Disconnected or faulty fan: If the fan inside the wine cooler is not working correctly, it can cause cooling issues. Make sure the fan is connected and functioning properly. Clean any accumulated dust or debris that may be affecting its performance.
Power supply issues: Verify that the wine cooler is receiving power. Check the outlet and ensure it is working correctly. If the power supply is interrupted, try resetting the circuit breaker or replacing the fuse.
Thermostat settings: Double-check the thermostat settings on your wine cooler. Ensure that it is set to the desired temperature and functioning correctly. Refer to the user manual for instructions on adjusting the thermostat.
Door seal problems: A faulty door seal can lead to warm air seeping into the wine cooler, causing inadequate cooling. Inspect the door seal for any damage or gaps. If necessary, replace the seal to ensure a tight and proper seal.
Please note that these troubleshooting steps may vary depending on the make and model of your wine cooler. Always consult the manufacturer’s instructions and guidelines specific to your appliance.
If you have tried these troubleshooting tips and the problem persists, it is recommended to contact a qualified appliance technician or the manufacturer’s customer support for further assistance. They will have the expertise to diagnose and repair any complex issues with your wine cooler.
Remember, proper maintenance and care can help extend the lifespan and performance of your wine cooler. Regularly cleaning the unit, keeping it away from heat sources, and following the manufacturer’s guidelines will contribute to trouble-free operation.
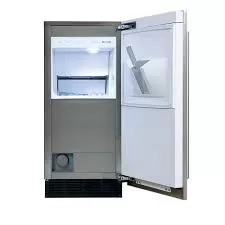
Ice makers are a convenient feature of many refrigerators, providing us with a steady supply of ice cubes. However, like any appliance, ice makers can encounter issues from time to time. If you’re experiencing problems with your ice maker, here are some troubleshooting steps to help you identify and potentially resolve the issue:
Check the power and water supply: Ensure that your refrigerator is properly plugged in and receiving power. Also, make sure that the water supply line is connected securely and not obstructed or kinked.
Verify the ice maker is turned on: Double-check that the ice maker is switched on and hasn’t accidentally been turned off. Look for a control arm or switch inside the freezer compartment that activates the ice-making process.
Inspect the water inlet valve: The water inlet valve controls the flow of water into the ice maker. If it’s faulty or clogged, it may prevent water from entering the ice maker. Check for any leaks, damage, or blockages and replace the valve if necessary.
Clean or replace the water filter: A clogged or dirty water filter can restrict water flow, affecting the ice-making process. Refer to your refrigerator’s manual for instructions on cleaning or replacing the water filter.
Check the water supply line: Examine the water supply line for any kinks, bends, or obstructions that may be obstructing water flow. Straighten any kinks and clear any blockages to ensure proper water supply to the ice maker.
Inspect the ice maker mold and fill tube: Ice can sometimes get stuck in the mold or fill tube, hindering the production of new ice cubes. Gently remove any ice buildup and ensure that the fill tube is clear.
Adjust the freezer temperature: If the freezer compartment is too warm, it can affect the ice-making process. Ensure that the freezer temperature is set between 0°F and 5°F (-18°C to -15°C) for optimal ice production.
Consider professional assistance: If you’ve tried the troubleshooting steps above without success, it’s advisable to contact a qualified appliance technician. They will have the expertise to diagnose and repair more complex issues with your ice maker.
Remember, always prioritize safety when working with electrical appliances. If you’re unsure or uncomfortable with any step of the troubleshooting process, it’s best to seek professional help. With proper maintenance and care, your ice maker can continue to provide you with a steady supply of ice cubes for years to come.
When it comes to troubleshooting condenser problems, there are a few common issues that you can address before calling a professional. Here are some tips to help you diagnose and potentially fix the problem:
Check the power supply: Make sure that the breaker for the condenser unit is not tripped and that all fuses are intact. If the breaker is tripped or a fuse is blown, it may indicate a failed motor or electrical issue. Reset the breaker or replace the fuse if necessary.
Ensure proper airflow: A condenser unit requires sufficient airflow to work properly. Check for any obstructions around the unit, such as debris, plants, or furniture. Clear away any blockages to allow for adequate airflow.
Clean the coils: Over time, dirt and debris can accumulate on the condenser coils, impeding heat transfer. Use a soft brush or compressed air to gently clean the coils. Be sure to turn off the power before cleaning.
Check for refrigerant leaks: Inspect the condenser unit for any signs of refrigerant leaks, such as hissing sounds, oil stains, or ice buildup. If you suspect a leak, it’s best to contact a professional technician to handle the repair.
Test the fan motor: The fan motor plays a crucial role in circulating air over the condenser coils. If the fan motor is not functioning properly, it can lead to cooling issues. Check for any unusual noises or lack of movement from the fan. If needed, replace the fan motor.
Inspect the condenser fins: The condenser fins can become bent or damaged, affecting heat dissipation. Gently straighten any bent fins using a fin comb or a flathead screwdriver. Be careful not to damage the fins further.
Check the thermostat settings: Ensure that the thermostat is set to the desired temperature and functioning correctly. If the thermostat is faulty, it may not signal the condenser to turn on or off as needed.
Regular maintenance: To prevent future issues, schedule regular maintenance for your condenser unit. This includes professional tune-ups, cleaning, and inspection to ensure optimal performance.
It’s important to note that these troubleshooting steps may vary depending on the specific type and model of the condenser unit. Consult your owner’s manual or contact the manufacturer for more detailed instructions tailored to your unit.
If you have tried these troubleshooting tips and the problem persists, it’s recommended to seek professional assistance from a qualified HVAC technician. They will have the expertise to diagnose and repair any complex condenser problems, ensuring efficient and reliable operation of your cooling system.