Mon to Fri: 8:00am - 6:00pm | Sat - Sun: 8:00am – 2:00pm
Samsung Appliance Repair Houston

Samsung, the South Korean company, is a global leader in manufacturing electronic devices for homes, businesses, industries, and space explorations. Experience excellent quality and style with Samsung’s consumer line, including digital media devices, cooking appliances, and living appliances. Discover innovation, reliability, and sophistication in Samsung’s range of products.
Samsung, a renowned company, has an intriguing history. It began in 1938 as a humble grocery store founded by Lee Byung-Cull. In its early days, Samsung specialized in selling noodles and later expanded by venturing into grocery exports to China. After the war, Samsung successfully transitioned into the textile industry, benefitting from governmental policies supporting local businesses. By the 1970s, Samsung had evolved into a comprehensive textile company, handling the entire production cycle, from raw materials to the finished products.
Samsung’s journey began by exploring new areas, like building ships and making chemicals. They even started making black and white TVs! Later on, they expanded their business globally, exporting electronics and cooking appliances. In 1978, Samsung took a big leap into technology by creating a semiconductor subsidiary and an aerospace division. Today, Samsung is a top technology company that excels in many fields, including home appliances, entertainment, and business solutions. You can trust Samsung to provide cutting-edge technology for all your needs, from the kitchen to the living room. And if you ever need Samsung appliance repair, they’ve got you covered. Samsung appliance repair is available to help you with any issues you might have. Just give them a call!
Looking for expert Samsung appliance repair services in Houston and Greater Houston areas? Look no further than Appliance Cowboys! Our team of highly trained and licensed electrical and electronics repair experts specializes in servicing and repairing Samsung home appliances. Contact us today for fast, reliable, professional Samsung appliance repairs near you.
At Appliance Cowboys, we offer affordable and reliable Samsung appliance repair services. We are experts in fixing Samsung refrigerators, washers, and other appliances. Our goal is to help you make your appliances last longer. We use quality parts, and our repairs are done quickly.
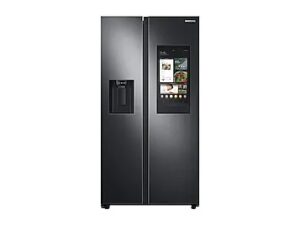

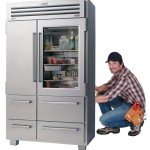
Samsung Refrigerator Repair
Samsung fridges are known for being super energy-efficient. They have a really sleek and modern design, with the freezer conveniently located at the bottom for all your food storage needs. When it comes to reliability, durability, and cost-effectiveness, Samsung fridges are top-notch. To make sure your Samsung fridge lasts a long time, it’s important to clean and replace its filters regularly. This will keep it running smoothly for years to come. Remember, if you ever need help with Samsung appliance repair or Samsung refrigerator repair, some professionals can assist you. Just make sure to take good care of your fridge!
Samsung Refrigerators Problems To Look Out For
Is your Samsung fridge acting up? Well, fridges are super important. They keep your food fresh and your drinks cold. But sometimes, things can go wrong. That’s why it’s really important to figure out the problem and fix it fast. In this guide, we’re going to tell you about some common issues you might have with your Samsung fridge. We’ll help you figure out what’s wrong and when you need to call in the experts for Samsung appliance repair or Samsung refrigerator repair. Don’t worry; we’ve got you covered!
Common Samsung Refrigerator Problems:
- Temperature Fluctuations: If your refrigerator is not maintaining a consistent temperature, it can lead to food spoilage. Check the thermostat settings and clean the condenser coils. If the issue persists, it may require professional attention.
- Excessive Frost Buildup: Ice buildup in the freezer can reduce cooling efficiency. Defrost your freezer regularly and ensure the door seals properly to prevent warm air from entering.
- Water Leaks Inside: A common issue is water pooling at the bottom of the refrigerator. Check the drain line for clogs and the water filter for leaks. Sometimes, a blocked defrost drain can cause water to accumulate.
- Noisy Operation: Unusual noises like humming, rattling, or clicking can signal malfunctioning fans, motors, or ice maker components. Inspect these parts and replace any that are faulty.
- Ice Maker Problems: If your ice maker needs to produce or dispense ice correctly, check the water supply line, inlet valve, and ice maker unit for issues. A malfunctioning ice maker can be repaired or replaced.
Addressing common Samsung refrigerator problems promptly is crucial to prevent food spoilage and expensive repairs. Some issues can be resolved with DIY troubleshooting and maintenance, while others may require the expertise of a professional Samsung refrigerator repair service. Regular maintenance and timely problem-solving ensure your Samsung refrigerator’s efficient and reliable functionality. Don’t let issues linger—take proactive steps to keep your refrigerator running smoothly.
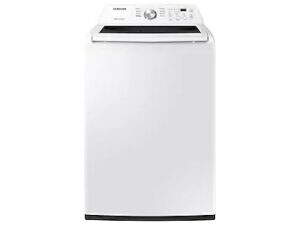
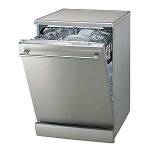
Samsung Washer Repair
Samsung washers are super cool! They have a big drum, so you can wash lots of clothes at once, which is super convenient. These washers are known for being really good at cleaning and taking care of your clothes. Plus, they save energy, which is good for the planet and saves you money. You can even add extra water if you want! It’s like having total control over your washing. So, if you ever need Samsung appliance repair or Samsung washer repair, these washers are a great choice. They’re efficient, convenient, and awesome!
Samsung Washer Problems To Look Out For
Samsung washers are known for their advanced features and powerful cleaning abilities. However, like any appliance, they can develop specific issues over time. To quickly troubleshoot and fix these problems, it’s important to understand the common issues with your Samsung washer. Our guide will explain these problems in simple terms and offer tips to optimize your washer’s performance. Keep your Samsung washer running smoothly with our tips and tricks. Remember, if you need Samsung appliance repair or Samsung washer repair, we’re here to help!
Common Samsung Washer Problems:
- Water Leaks: Leaking water from your Samsung washer can result from damaged hoses, loose connections, or a malfunctioning water inlet valve. Promptly address any leaks to prevent water damage to your home.
- Spin Cycle Problems: If your washer fails to spin or experiences imbalance issues during the spin cycle, it could be due to an unbalanced load, a faulty drive belt, or problems with the drum or motor. These issues can affect the washer’s ability to drain water thoroughly.
- Excessive Noise: Unusual noises during operation, such as banging or grinding sounds, may indicate a problem with the drum bearings, tub springs, or a foreign object lodged between the drum and the tub.
- Drainage Issues: A clogged or slow-draining washer may be caused by a blockage in the drain pump filter, a kinked drain hose, or a malfunctioning drain pump. Proper drainage is crucial for effective washing.
- Dispenser Problems: Detergent, bleach, or fabric softener dispensers may become clogged or fail to release the products correctly. Regular cleaning and maintenance of these components can prevent issues.
Save money by being vigilant for these common issues in your Samsung washer. If you need more clarification about troubleshooting or fixing your washer, consulting with a professional Samsung washer repair service is wise. Regular maintenance and care can also prevent most of these issues, ensuring your washer delivers optimal performance for years. Find reliable tips and solutions for Samsung washer problems here.
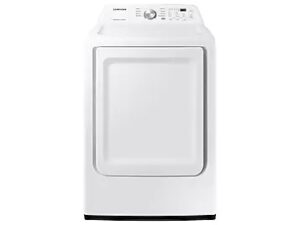
Samsung Dryer Repair
Samsung dryers are awesome! They dry clothes super fast and have different cycle modes, like steam, which makes clothes soft and wrinkle-free. They’re easy to use and make laundry time easy. To keep them working great, make sure to clean the vents and replace any broken parts. That way, they’ll last a long time and work like new! And if you ever need Samsung appliance repair or Samsung dryer repair, you know who to call!
Samsung Dryer Problems To Watch Out For
Having trouble with your Samsung dryer? No worries! We’ve got you covered with our comprehensive guide on Samsung dryer repair. Learn how to troubleshoot and fix common issues like a pro. Say goodbye to frustrating laundry days and hello to hassle-free drying with our expert tips. Keep your Samsung appliance running smoothly, and enjoy stress-free laundry!
Common Samsung Dryer Problems to Look Out For:
- No Heat or Insufficient Heat:
If your dryer isn’t producing heat or not enough heat, it may be due to a faulty heating element, thermal fuse, or thermostat. - Dryer Doesn’t Start:
When your Samsung dryer doesn’t start, it might indicate issues with the door switch, thermal fuse, or control board. - Excessive Noise:
Worn-out drum support rollers, idler pulleys, or a damaged belt may cause unusual noises like squeaking, thumping, or grinding. - Overheating or Burning Smell:
An overheating dryer or a burning smell can be dangerous and is often linked to lint buildup in the vent or a malfunctioning thermostat. - Drum Not Turning:
- If your dryer’s drum is not turning, it may be due to a broken belt or a faulty motor.
- Clothes Taking Too Long to Dry:
If your dryer takes longer than usual to dry clothes, it might be due to clogged vents or a malfunctioning thermostat.
If you’re experiencing common issues with your Samsung dryer, prioritizing safety is crucial. If you need more clarification about diagnosing or fixing the problem, or if it persists despite your efforts, you should contact a qualified technician or appliance repair service. Regular maintenance, prompt problem-solving, and proper cleaning are essential for ensuring the efficient operation of your Samsung dryer for years to come, making your laundry days stress-free. Contact our professional technicians for reliable Samsung dryer repair services.
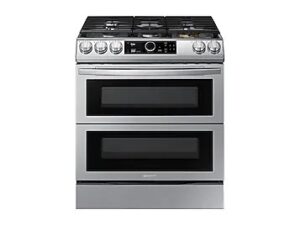
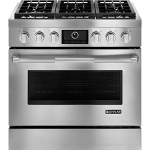
Samsung Range Repair
Samsung ranges are the best choice because they are affordable and have all the cool features. They look great in a modern kitchen and save energy, too! You can cook anything you want with their powerful burners. To keep your Samsung range working for a long time, you need to clean it and follow the instructions in the manual. This way, your range will keep working perfectly for many years.
Experiencing problems with your Samsung range? Learn about common issues and their solutions in this comprehensive guide. Whether you own an electric or gas range, understanding these problems can help restore your kitchen’s functionality. Get reliable tips to troubleshoot and fix your Samsung range today!
Common Problems to Look Out For:
- Temperature Inaccuracy:
Symptom: Uneven cooking, overcooking, or undercooking food.
Cause: A malfunctioning thermostat or temperature sensor. - Burner Ignition Issues (Gas Ranges):
Symptom: Burners won’t ignite or take a long time to light.
Cause: Clogged or damaged igniters, burner caps, or gas supply issues. - Oven Not Heating Up:
Symptom: The oven remains cold, and the heating element doesn’t glow.
Cause: A malfunctioning bake or broil element, faulty thermostat, or a broken igniter. - Door Won’t Close Properly:
Symptom: The oven door doesn’t close fully or won’t stay locked during the self-cleaning cycle.
Cause: Misaligned door hinges, a damaged door gasket, or latch issues. - Gas Odors (Gas Ranges):
Symptom: Smelling gas when the range is off or experiencing a gas leak.
Cause: Loose gas connections, damaged gas lines, or a faulty gas valve.
Have common issues with your Samsung range? Don’t worry! Addressing these problems promptly is crucial for safe and efficient cooking. While some concerns can be fixed with simple DIY solutions, others may require professional assistance. Maintaining your range’s functionality is vital to a well-functioning kitchen.
For expert Samsung range repair services, contact Appliance Cowboys today. Our skilled technicians will make sure to restore your range’s optimal performance. Don’t wait. Contact us now!
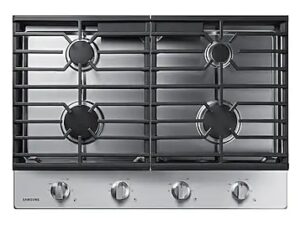
Samsung Cooktop Repair
Samsung cooktops are amazing! They look awesome and work really well. You can choose between induction, gas, or electric cooktops, and they all last a really long time. They have a lot of powerful burners that can cook things at just the right temperature. It’s important to clean and take care of your Samsung cooktop so it keeps working great for a long time. If you ever need help with Samsung cooktop repair or any other Samsung appliance repair, make sure to call the experts!
Samsung Cooktop Problems To Look Out For
Samsung cooktops are renowned for their innovation and dependability. However, like any appliance, they can experience issues over time. To ensure your Samsung cooktop’s optimal performance and longevity, it’s crucial to stay informed about common problems that may arise. This comprehensive guide will discuss the typical issues to watch out for regarding Samsung cooktop repair. Explore our tips and solutions to maintain the reliability and functionality of your Samsung cooktop.
Common Samsung Cooktop Problems:
- Burner Not Heating: If one or more burners on your Samsung cooktop are not heating correctly or taking too long to heat up, it could indicate a problem with the heating element or the control switch.
- Uneven Heating: Uneven heat distribution across a burner can result in uneven cooking. This issue may be due to a faulty element or problems with the cookware.
- Indicator Lights Not Working: Indicator lights that don’t illuminate when a burner is in use can make it challenging to know if the cooktop is on. This problem may be related to the control board or the indicator light.
- Control Panel Malfunctions: Issues with the control panel, such as unresponsive touch controls or error codes, can disrupt your cooking experience. These problems often require professional diagnosis and repair.
- Cracked Glass Surface: Physical damage like cracks or chips on the glass surface affects the cooktop’s appearance and can lead to safety hazards. In such cases, immediate replacement or repair is necessary.
By being vigilant about these prevalent issues, you can promptly handle problems with your Samsung cooktop. While some minor issues can be resolved through DIY solutions, it’s advisable to seek assistance from a qualified technician for intricate repairs or safety-related concerns. Ensuring regular maintenance and addressing problems promptly will optimize the efficiency of your Samsung cooktop in your kitchen. Discover how to address common Samsung cooktop problems today!
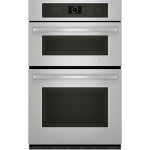
Samsung Wall Oven Repairs
Samsung’s wall ovens are super easy to use. They work really well and look really cool in your kitchen. You can control them easily and make amazing food. To make sure your Samsung wall oven lasts a long time, you should clean up any spills and take care of them. This will keep your cooking awesome for a long time. If you ever need help with Samsung appliance repair or Samsung oven repair, give us a call. We can fix it for you!
Samsung Wall Oven Problems To Look Out For
Discover the amazing features and performance of Samsung wall ovens. But sometimes, these ovens can have problems. Don’t worry! Our guide will help you find common issues in your Samsung wall oven. When you know the problem early, you can fix it quickly or call a professional for Samsung appliance repair. Trust us to keep your Samsung oven in great shape!
Common Problems with Samsung Wall Ovens:
- Temperature Inaccuracy: One of the most common issues is temperature inaccuracies. Your oven may not reach the desired temperature or could overheat.
- Faulty Ignition or Heating Element: If your oven fails to heat up or takes too long to preheat, it may indicate a faulty igniter or heating element.
- Uneven Cooking: Cheven cooking can result from issues with the oven’s fan or heating element. This leads to dishes being cooked unevenly.
- Door Seal Problems: A damaged or worn door seal can cause heat loss, leading to longer cooking times and energy wastage.
- Control Panel Malfunctions: Control panel issues, such as unresponsive buttons or error codes, can disrupt your oven’s operation.
If you own a Samsung wall oven, you know how reliable they are. However, like any appliance, there might be occasional issues. Don’t worry! Regularly maintaining and promptly addressing common problems can keep your Samsung wall oven running smoothly. If you encounter complex issues or need help with repairs, it’s wise to contact a professional Samsung wall oven repair service. They can provide expert assistance when you need it most.
Troubleshooting Guide In Repairing Common Issues With Your Samsung Appliances
Troubleshoot Common Samsung Refrigerator Issues
Is your fridge struggling to maintain a consistent temperature? It could be due to a worn refrigerator door seal. Don’t worry; we’ve got you covered! This guide will delve into common causes of temperature fluctuations and provide easy tips to fix them. Stay tuned for practical solutions to keep your fridge in top shape!
- Frequent Door Opening: Opening the fridge door frequently or for too long disrupts its cooling efficiency. Cold air escapes each time, making the fridge work harder to recover, which can cause sudden temperature drops.
Fix: To check if door openings are the issue, refrain from opening the fridge for a few hours and observe if the temperature stabilizes. If it does, limit the frequency of door openings.
- Damaged Door Seal: A damaged door seal is a common and fixable problem. When compromised, cold air leaks out, leading to temperature fluctuations.
Fix: Inspect the seal for bubbles, warping, or dirt. If damaged, order a replacement seal from the manufacturer’s website and follow the installation instructions.
- Accidental Temperature Adjustments: Fluctuating temperatures could be due to unintended setting changes, possibly when loading or unloading groceries.
Fix: Ensure no one accidentally adjusts the temperature settings. Educate household members about the location of the temperature dial. If adjustments persist, reset the fridge’s thermostat to stabilize the temperature.
- Blocked Vents and Sensors: Overloading the fridge or blocking vents with food can cause temperature fluctuations. Blocked sensors can also disrupt temperature regulation.
Fix: Avoid overfilling the fridge and ensure food and containers don’t obstruct vents or sensors. Allow the fridge to run for a few hours after reorganizing to assess temperature stability.
- Dirty Compressor Coils: Dirty coils hinder heat removal in the fridge, affecting temperature regulation. Dusty or blocked coils prevent effective heat escape, causing temperature issues.
Fix: Clean the compressor coils by pulling the fridge away from the wall. Use a vacuum to remove dirt and debris, then wipe the coils with a damp cloth. Return the fridge to its position, plug it in, and monitor the temperature.
When ice or frost forms inside your refrigerator or freezer, it disrupts the cooling process. This issue typically arises when cool air encounters hot or humid air, resulting in frost at the point of contact.
Common Causes
- Improperly Closed Door
- Inadequate Ventilation
- Ice Maker Flap (Covering Ice Route) Left Open
Solutions
Freezer Compartment
- Improperly Closed Door
- Ensure the freezer door closes completely.
- Verify that the door gaskets are securely attached, clean, and in good condition. Consider replacing the seals if a dollar bill can be easily pulled out when closed in the door.
- Avoid placing packages against the rear wall of the freezer.
- Inadequate Ventilation
- Prevent packages from resting against the rear freezer wall.
- Space out food items to allow for better air circulation.
- Ensure the freezer’s air vent is unobstructed.
- Ice Maker Flap (Covering Ice Route)
- Check the ice dispenser flap on the left side door. It should be flush against the housing.
- If the flap isn’t flush, inspect for ice or debris blocking it.
Refrigerator Compartment
- If your refrigerator is freezing food, raise the temperature slightly.
- If the refrigerator is too warm, lower the temperature by a few degrees.
Key Reminders: When opening or closing the freezer door, slight frost buildup may occur in environments with high humidity. Don’t worry! The freezer is designed with a built-in heater to melt this accumulation. Stay worry-free and keep your freezer in top condition.
If you find your Samsung fridge freezer leaking water, don’t worry; you can try a few standard solutions at home to address this issue. One possible cause of the leakage could be a clogged or frozen defrost drain, quickly cleared with hot water or a gentle pipe cleaner. It’s also worth checking if the freezer door is sealed correctly, as any gaps or cracks could result in condensation buildup and subsequent water leakage. By taking these steps, you can effectively troubleshoot and resolve the water leakage problem with your Samsung fridge freezer.
- Check the Door Seal and Closure: Ensure the door closes properly and isn’t obstructed. Test the seal by feeling for escaping cold air or using a sheet of paper – if it pulls out quickly, the seal may need repair or replacement.
- Clear the Defrost Drain: Look for the defrost drain inside your freezer, often at the bottom behind a panel. Debris can clog it, causing leaks. Remove any blockages manually or flush with warm water.
- Inspect the Drip Pan: Located at the back of the freezer, the drip pan can collect dirt and debris. Remove it and clean it out if necessary.
- Check Connections: Examine the hoses and connections at the rear of the appliance for any loose or damaged components.
- Level the Appliance: Ensure the fridge/freezer is slightly tilted backward. This helps condensation flow into the drip pan below and prevents water from leaking onto the floor. Adjust the front legs if needed.
- Confirm the Source: Ensure the leak comes from your fridge/freezer, not from melting ice cubes or spills from other areas.
By following these simple yet effective steps, you can effortlessly tackle and resolve common causes of water leakage in your Samsung refrigerator. Don’t let pesky drips and spills dampen your experience; equip yourself with the knowledge to keep your fridge in optimal condition and safeguard your precious groceries.
A noisy refrigerator can be frustrating and worrisome. But worry not! We have covered you with practical steps to reduce refrigerator noise and optimize its efficiency. Discover our comprehensive guide for achieving a quieter and more reliable refrigerator. Find out how to silence your fridge and keep it running smoothly!
- Level Your Refrigerator: Start by ensuring your refrigerator is level. An unlevel fridge can cause vibrations and noise. To do this, adjust the front legs of your refrigerator so that it’s inclined at an angle of plus or minus 10 to 15 degrees, with a slight tilt backward. You can use a flat-blade screwdriver to turn the leg nuts. Clockwise rotation raises the fridge, while counterclockwise lowers it. A level refrigerator reduces noise caused by vibrations.
- Tighten the Hinge: If you’ve recently moved your refrigerator or noticed extra noise from the doors, check the hinge area. Loose nuts or screws in the hinge can lead to increased noise. Simply tighten these components to secure the doors and minimize unwanted sounds.
- Create Adequate Space: Proper clearance around your refrigerator is crucial for efficient and quiet operation. Make sure there’s at least 5 centimeters of space between the back of the refrigerator and the wall. This clearance allows for adequate airflow, preventing the fridge from working harder than necessary and generating excess noise.
- Optimize the Interior: Organize the items inside your refrigerator to reduce internal noise. Glass containers or loose items can vibrate and create unpleasant sounds. Use non-slip shelf liners or arrange items securely to prevent movement and noise.
- Inspect for Foreign Objects: Occasionally, foreign objects like food packaging, utensils, or debris can find their way under or behind the refrigerator. Inspect these areas regularly to ensure nothing is obstructing the appliance’s operation.
- Give it Time: After implementing the above steps, allow your refrigerator at least 24 hours to settle. Some noises can be transient and may resolve independently as the appliance stabilizes. If the noise persists beyond this period, it’s advisable to contact the manufacturer’s service center for further assistance.
Reduce refrigerator noise, enhance efficiency, and extend lifespan. Maintain & position your refrigerator for quiet operation. Save energy & money in the long run with these steps.
Suppose your Samsung ice maker is not functioning properly. In that case, it may be caused by various factors such as ice buildup, a faulty water inlet valve, low water pressure, an expired water filter, or a malfunctioning auger motor. Here are some troubleshooting tips to help you fix common issues. Samsung products are widely recognized for their durability, but occasional problems with the ice maker can occur. Explore steps to troubleshoot and address these concerns effectively.
Ice Buildup or Blockage:
- Ice often accumulates in the ice maker tray or dispenser tube.
- To resolve this, defrost the ice maker or refrigerator if needed.
- You can use a hairdryer for a gentle heat treatment to thaw the components.
Defective Water Inlet Valve:
- A faulty water inlet valve is a common issue.
- Locate the valve behind the refrigerator’s rear access panel.
- Turn off the water supply and disconnect the power before replacing it.
Poor Water Pressure:
- Ensure water pressure is at least 20 psi for proper ice maker function.
- Use a pressure gauge or check the water flow when disconnecting the supply line.
- Weak water flow may indicate low pressure.
Expired Water Filter:
- Change the water filter every six months as Samsung recommends.
- If water or ice looks cloudy, it’s a sign the filter needs replacing.
- Filters are typically easy to remove and replace.
Failed Auger Motor:
- The auger motor is responsible for ice dispensing.
- If it’s noisy and not dispensing ice, the motor may fail.
- Test the motor’s continuity with a multimeter.
Troubleshoot Common Samsung Washer Issues
Regarding your Samsung washer, encountering issues can disrupt your laundry routine. From water leaks to unusual odors, understanding how to troubleshoot and address these problems is essential. In this comprehensive guide, we’ll walk you through quick fixes for common Samsung washer problems, ensuring your laundry experience is smooth and hassle-free.
- Check and replace a damaged door seal.
- Ensure the detergent drawer is closed and not overloaded.
- Inspect hoses and replace damaged ones.
- Use a bubble level to adjust the washer’s legs for proper leveling.
- Check for clogs in the drain pump and replace if necessary.
- Remove foreign objects from the drum.
- Follow detergent guidelines to avoid excessive suds.
- Ensure the drain hose is correctly positioned.
- Always disconnect power and water before troubleshooting, and consult a professional if needed.
- Pause and redistribute the load evenly.
- Verify the washer is properly leveled using a bubble level.
- Remove any foreign objects from the drum.
- Examine the drive belt for damage and replace if needed.
- Replace worn shock absorbers for reduced noise.
- Refer to the manual for error code explanations.
- Replace a worn motor coupling if necessary.
- Seek professional assistance for complex problems.
- Distribute the load evenly during cycles.
- Check and ensure the washer sits evenly on the floor.
- Remove any foreign objects from the drum.
- Replace worn shock absorbers.
- Address rumbling noises by replacing faulty drum bearings.
- Tighten loose components like screws or bolts.
- Consult a technician for professional assistance.
- Clean the drain filter to remove debris.
- Check the drain hose for kinks or blockages.
- Inspect the drain pump for debris or damage.
- Refer to your manual for error code explanations.
- Ensure the drain hose has the proper slope.
- Seek professional help if issues persist.
- Clean the dispenser drawer and compartments.
- Ensure the drawer is closed securely and check for clogs.
- Clean the fabric softener compartment.
- Check for clogs and use the correct bleach in the bleach compartment.
- Clean compartments and hoses to prevent water retention.
- Remove obstructions if the dispenser drawer is stuck.
- Refer to the manual or consult a technician for damaged dispenser components.
- Regular cleaning and maintenance can prevent issues.
Troubleshoot Common Samsung Dryer Issues
If you’ve ever encountered issues with your dryer, you’re not alone. Dryers are essential home appliances designed to make laundry day a breeze. However, when they start exhibiting problems, it can be frustrating. Let’s explore some common dryer issues and how to troubleshoot them effectively.
- Blocked Vent
One frustrating situation is when your dryer heats up, but your clothes stay damp. A clogged vent often causes this problem. The vent system expels hot, moist air. It can’t escape properly when obstructed, leaving clothes damp. To resolve this, check for blockages like lint buildup and clear them. If your dryer generates weak heat and laundry takes too long, the vent is likely the culprit. A partially blocked vent restricts airflow, reducing heating efficiency. Address this by following the same steps to clean the venting system.
- Dirty Moisture Sensors
If your dryer shuts off too soon with wet clothes, dirty moisture sensors might be the culprit. These sensors detect moisture levels to know when clothes are dry. However, lint or residue can cause them to malfunction. To fix it, clean the sensors with a soft cloth and rubbing alcohol.
Additional Troubleshooting Steps
- Check for proper electrical connections: Ensure that your dryer is securely plugged in and there are no circuit breaker or fuse issues.
- Inspect the lint filter: A clogged filter can hinder airflow and reduce drying efficiency. Clean it before every cycle to maintain optimal performance.
- Examine the exhaust duct: Make sure the exhaust duct, leading from the dryer to the outside, is free from obstructions or damage.
- Consult the user manual: Refer to your dryer’s manual for specific troubleshooting guidance and maintenance tips.
If you’ve followed these troubleshooting steps but cannot resolve the issue, consulting a professional appliance technician is recommended. They possess the expertise to diagnose and repair complex problems, restoring the efficient functionality of your dryer. Say goodbye to laundry day woes with their assistance!
A non-starting Samsung dryer can leave you with a pile of wet clothes and unfinished laundry. Why did your Samsung dryer not start? It could be due to various issues, but fear not; here are some common reasons and solutions to get your dryer up and running.
No Power Supply
- Ensure the dryer is plugged in securely and the cord is undamaged.
- Avoid using extension cords as they may not supply enough voltage.
- Examine and reset your home’s circuit breaker box for tripped breakers.
Incorrect Dryer Settings
- Disable the Control Lock by pressing and holding the Drying Level and Time buttons simultaneously for 3 seconds.
- Deactivate Delay Start by turning the dryer off and then back on using the Power button.
- Remember to press and hold the Start button for 2-5 seconds to initiate a drying cycle.
Door Latch Issue
- Ensure the dryer door is entirely closed to engage the door latch, which activates the door switch to start the drying cycle. If it’s not closed properly, the dryer won’t start.
Faulty Start Switch
- If the Start button fails to initiate the dryer and there’s no humming sound, the start switch might be faulty. Test it with a multimeter for continuity; replace it if it’s not working.
Thermal Fuse Problem
- A blown thermal fuse can cut power to the dryer to prevent overheating. Check for a lack of continuity with a multimeter; if it’s blown, replace it. Also, inspect and clear any clogged dryer vents to prevent overheating.
If your Samsung dryer is experiencing strange noises and vibrations, don’t worry! We’ve got you covered with some helpful information. Learn about common causes and solutions to restore your dryer to optimal performance. Keep reading to find out more!
Check the Installation
- Ensure your dryer is on a stable surface to prevent rattling and vibrations.
- Adjust the leveling feet using a carpenter’s level and a wrench if necessary.
- Avoid placing the dryer on soft tiled flooring or carpet, which can lead to movement and vibrations.
- Ensure at least an inch of space between the back of the dryer and any nearby objects, such as hoses or power cords.
Identify the Type of Sound
- Some humming or buzzing noises during the dryer cycle are normal, caused by the motor pulling air quickly.
- In cold environments or after extended periods of non-use, the rubber roller inside the dryer may produce thumping sounds.
- Squeaking or squealing sounds may occur if the dryer is overloaded; reduce the load weight if needed.
- Be sure to follow the recommended load size from your user manual.
Watch for Items That Can Cause Noise
- Heavy items like bathmats or jeans can create knocking, or thumping sounds evenly distribute the load.
- Always empty pockets before loading clothes to prevent metallic objects like coins or keys from damaging the drum.
- Garments with attached metallic items, such as zippers or latch hooks, may make jingling sounds; try turning the garment inside out.
- The buzzing sound during the cycle is normal and comes from the drain pump as it operates to discharge condensation.
Is your dryer emitting a burning odor? Don’t ignore it, as it poses a fire hazard. Follow these steps to address the issue promptly and safely.
Method 1: Removing Lint Buildup
- Start by removing lint from the lint catcher, found on the front or under a flap for different dryer types.
- Unplug the power cord or gas line for safety.
- Remove the top panel to access the lint that may have fallen beyond the lint trap.
- Use a dryer brush or vacuum attachment to clean the lint filter opening.
- Reassemble and test your dryer. If the smell persists, move on to the next step.
Method 2: Vacuuming the Inside of the Dryer
- Unplug the power and gas lines if applicable.
- Remove the bottom panel to access the interior.
- Use a vacuum hose attachment to remove lint buildup inside the dryer.
- Reattach the panels and test the dryer. If the smell persists, proceed to the following method.
Method 3: Cleaning the Hose and Vent
- Ensure the power and gas are disconnected.
- Slide the dryer away from the wall to access the exhaust hose.
- Unscrew and detach the hose, cleaning out the lint with a vacuum.
- Use a dryer vent cleaning brush to clean lint from the wall vent.
- Reconnect and test the dryer. If the smell continues, proceed to the last method.
Method 4: Inspecting Internal Parts
- Check the thermostat with a multimeter. Replace it if it reads infinity.
- Inspect the heating element for breakage or burning. Replace if necessary.
- Examine wires attached to the heating element in a gas dryer for damage.
- Call a professional to replace the belt if it appears damaged or loose.
Struggling with a non-spinning dryer on laundry day? No need to fret! At Asurion, we specialize in appliance repair, alleviating the frustration of malfunctions. This comprehensive guide will explore why your dryer lacks spin and provide straightforward solutions to resolve the issue. Discover quick and practical tips to get your dryer up and running smoothly in no time!
- Unplugged Dryer: Check if the dryer is unplugged or if the cord has loosened; plug it back in securely.
- Tripped Circuit Breaker: Verify that the circuit breakers related to your dryer are turned on, and reset them if needed.
- Tripped Thermal Fuse: A safety feature, the thermal fuse may have tripped due to overheating. It might need replacement, signaling a potential fire hazard. Consult a professional for inspection and diagnosis.
- Faulty Door Switch: Examine the door switch’s plastic peg; if bent, straighten it. If the peg appears okay but the dryer still won’t start, consider replacing the switch.
- Broken Drive Belt: Open the dryer door and attempt to turn the drum manually; if it spins too quickly, the drive belt may be broken and should be replaced.
Troubleshoot Common Samsung Range Issues
Are your culinary creations often undercooked or overcooked? Don’t blame your cooking skills just yet. Your Samsung oven’s temperature might be the culprit. Here are common signs of an inaccurate oven temperature:
- Extended Cooking Times: If your dishes take longer than usual, your oven temperature may be off.
- Unevenly Cooked Food: When one side of your food is raw while the other is fully cooked, it indicates temperature inconsistency.
Possible Causes of Samsung Oven Temperature Issues:
- Burned-Out Bake Element: In electric ovens, a malfunctioning bake element is a frequent cause of temperature discrepancies. Look for visible damage and inadequate heating, or use a multimeter to test continuity.
- Faulty Igniter: Gas ovens rely on igniters to open the gas valve and ignite the gas. If it’s weak, your oven may not heat up correctly. In such cases, the igniter needs replacement.
- Burned-Out Broil Element: The broil element, found at the oven’s top, can burn out, resulting in undercooked food on top. Check for visible damage and use a multimeter for continuity testing.
- Thermostat Calibration: If your oven has no physical issues, the thermostat may need recalibration. Your user manual should have instructions on calibrating it, ensuring accurate temperature control.
Do you have any troubles with your Samsung oven temperature? Reach out to the reliable professionals at Appliance Cowboys for prompt and efficient resolution of oven malfunctions. Our experts will ensure you can savor flawlessly cooked meals in no time. Call us today for reliable oven repair services.
Many homeowners prefer gas ranges for their quick and precise cooking capabilities. Yet, facing issues like a Samsung gas range failing to ignite can be quite frustrating. This guide will walk you through practical steps to tackle these common problems.
Step 1: Check Power Supply
The power supply is the first, often overlooked, cause of a non-igniting Samsung gas range. Despite being gas-powered, your range relies on electricity to ignite the burners.
Ensure your stove is plugged in correctly, and verify that the breaker hasn’t tripped. If power isn’t the culprit, the issue might be due to burner cleanliness or moisture.
Step 2: Deal with Moisture Buildup
Sometimes, a gas stove igniter may fail to spark after cleaning or a significant spill. In such cases, lingering moisture from cleaning or spills can hinder the burner’s ignition.
After cleaning or addressing spills, thoroughly dry each burner component with a soft cloth and allow ample air-drying before reassembling.
Step 3: Remove Food Residue
Even the most meticulous chefs can’t avoid occasional stove messes. Regular cleaning is essential to prevent food debris or grease from obstructing the gas flow to the igniter and clogging burner components.
Here’s a simple cleaning process:
- Remove the burner grate covering the affected burner.
- Lift off the burner base.
- Soak the base in vinegar or warm water, using a stiff brush to remove stubborn debris.
- Dry the burner base with a soft cloth and let it air dry thoroughly.
- Clean the area around the burner with warm, soapy water and a soft cloth.
- Carefully clear any debris from the burner ports with a straightened paper clip.
- Reassemble the burner and grille.
Step 4: Investigate Component Failures
A component may malfunction if your Samsung gas range still won’t ignite despite troubleshooting and cleaning. Common culprits include:
- Spark Module: Each burner has a spark module that powers the spark electrode for gas ignition. A faulty module provides insufficient power, preventing ignition. In this case, the spark module needs replacement.
- Spark Ignition Switch: This switch supplies electricity to the spark module. A malfunctioning switch means no electricity reaches the spark module, resulting in no spark for gas ignition. Replace a faulty spark ignition switch.
- Spark Electrode: This component is responsible for sparking and igniting the gas when you turn on the burner. It can wear out over time, leading to continuous sparking without a flame. A malfunctioning spark electrode also requires replacement.
If your Samsung gas range continues to exhibit ignition issues after cleaning and troubleshooting, don’t hesitate to contact Caesar’s Appliance Sales & Service for professional gas range repair assistance. Ensure your appliance operates flawlessly with Appliance Cowboys.
Do you need to heat up your Samsung range oven? Don’t worry! Our comprehensive troubleshooting guide is here to help. Follow our step-by-step process to diagnose and resolve common issues affecting your oven’s performance. Don’t let cooking interruptions ruin your meal – learn how to address this frustrating problem and get your Samsung range oven back to heating up properly. Trust us, you’ll be back to cooking delicious meals in no time!
Step 1: Check the Power Supply
Ensure that the range is correctly plugged into a functioning power outlet.
Check for a blown fuse or tripped circuit breaker in your home’s electrical panel. Replace the fuse or reset the breaker if necessary.
Confirm that there are no issues with the power cord or plug. Replace any damaged components.
Step 2: Verify the Oven’s Settings
Double-check that you have selected the correct cooking mode (bake, broil, etc.) and set the desired temperature.
Ensure the timer is not active, as the oven won’t heat up while the timer is counting down.
Step 3: Inspect the Oven Igniter
The oven igniter is responsible for lighting the gas burner in gas ovens. If it’s faulty, the oven won’t heat up.
Locate the igniter, which is usually located at the back of the oven. It’s a small, rectangular, round device with wires attached.
Turn on the oven and observe the igniter. It may need to be replaced if it doesn’t glow bright orange within a few minutes.
Step 4: Check the Gas Supply (For Gas Ovens)
If you have a gas range oven, ensure the gas supply valve is open.
Inspect the gas line for any kinks, bends, or damage obstructing the gas flow.
If you smell gas, but the oven doesn’t ignite, immediately turn off the gas supply and contact a professional for repair.
Step 5: Test the Bake Element (For Electric Ovens)
In electric ovens, the bake element is responsible for heating. If it’s defective, the oven won’t heat up.
Remove any oven racks and look for a hidden bake element at the bottom of the oven.
Turn on the oven and visually inspect the element for signs of damage, such as visible breaks or burn marks. If damaged, it should be replaced.
If your oven door isn’t closing as it should, it may be due to the door latch:
- Latching Trouble: If the door latch fails to engage the door catch at the top, it can remain in the “locked” position and won’t return to the initial position, leaving the door partially open.
- Reset the Latch: To reset the door latch, press and hold the Child Lock button for 3 seconds while simultaneously holding down the door plunger switch. The door plunger switch is a small button-like piece near the top of the door frame, usually pressed in when the door is closed.
- Apply gentle pressure to the door latch for about 20 seconds or until it returns to its normal, open position.
Follow these steps to ensure your Appliance Cowboys oven is working well. If issues persist, consider seeking professional assistance.
01 – Samsung Range/Stove/Oven Valve
While all gas ranges will have a slight gas smell when the burners first light, a persistent smell could result from a damaged valve or gas tube. You can apply a non-corrosive leak detection solution or dish soap mixed with water to the valve or tube connection points. The solution will bubble if a gas leak is present. If you suspect a leak is present, you should shut off the gas supply immediately until the issue can be resolved.
02 – Samsung Range/Stove/Oven Gas Valve Assembly
All gas ranges will have a slight gas smell when the burners light. This is normal. The smell should go away quickly after the burner has lit. If you still smell gas after the burner has lit, or when the range is not in use, you must call a certified technician to fix it.
03 – Samsung Range/Stove/Oven Safety Valve
All gas ranges will have a slight gas smell when the burners light. This is normal. The smell should go away quickly after the burner has lit. If you still smell gas after the burner has lit, or when the range is not in use, the safety valve may be damaged and you should contact a certified technician to fix it.
04 – Samsung Range/Stove/Oven Igniter
All gas ranges will have a slight gas smell when the burners light. This is normal. The smell should go away quickly after the burner has lit. If the oven burner lights within 90 seconds, but you still smell gas, the igniter may fail.
05 – Samsung Range/Stove/Oven Surface Burner Valve
All gas ranges will have a slight gas smell when the burners light. This is normal. The smell should go away quickly after the burner has been lit. If you still smell gas after the burner has lit or when the range is not in use, the safety burner valve may be damaged, and you should contact a certified technician to fix it.
Troubleshoot Common Samsung Cooktop Issues
Fix: If a burner is not heating, check if it’s properly connected. Ensure that the burner cap and base are clean and free from debris. If it’s an electric cooktop, inspect the heating element for visible damage and replace it if necessary. For gas cooktops, verify the gas supply and igniter are functioning correctly.
Fix: Uneven heating can be caused by irregular cookware or burner caps that need to be seated properly. Use flat-bottomed cookware that matches the burner size. Make sure the burner caps are correctly placed to ensure even flame distribution.
Fix: Inspect the power source and control panel if indicator lights are not working. Check the user manual for specific instructions on resetting or replacing indicator lights. In some cases, this may require professional assistance.
Fix: If the control panel is malfunctioning, first try resetting the cooktop by turning off the power and then turning it back on. If the issue persists, consult the user manual for troubleshooting tips. For complex control panel problems, contacting Samsung customer support or a technician may be necessary.
Fix: A cracked glass surface typically requires professional repair or replacement. Using a cracked surface can be dangerous and lead to further damage. Contact Samsung’s customer support or a technician for assessment and repair options.
Troubleshoot Common Samsung Wall Oven Issues
Samsung wall ovens are renowned for their quality and performance, but they can encounter issues like any appliance. In this guide, we’ll explore some common problems with Samsung wall ovens and provide troubleshooting tips to help you resolve these issues.
Fix: Check the oven’s temperature sensor for any damage or loose connections. If necessary, replace the sensor. Additionally, consider calibrating the oven’s temperature settings following the manufacturer’s instructions.
Fix: If you have a gas oven, ensure the gas supply is on and the igniter works correctly. Replace the igniter if it’s faulty. For electric ovens, inspect the bake and broil elements for damage. If needed, replace the defective element.
Fix: Uneven cooking can result from a malfunctioning convection fan or improper rack placement. Verify that the convection fan is operational. Adjust rack positioning for more even heat distribution. You can also rotate dishes during cooking for better results.
Fix: Inspect the oven door gasket (seal) for wear or damage. Replace it if needed. Ensure the door is closing properly; hinges may need adjustment. A secure seal is crucial for efficient cooking.
Fix: If you experience issues with the control panel, try a hard reset by disconnecting power for a few minutes, then reconnecting it. If problems persist, consult your user manual for specific reset instructions or contact Samsung support for guidance.
Professional vs. DIY Repairs:
Benefits of hiring professionals for Samsung appliance repairs
- Expertise and Knowledge: Professional technicians are trained and experienced with Samsung appliances, ensuring quick and efficient solutions.
- Genuine Parts: Authorized repair experts have access to authentic Samsung replacement parts, maintaining compatibility and warranty.
- Time-Efficient Repairs: Professionals diagnose and fix issues swiftly, reducing downtime for essential appliances.
- Safety Assurance: Technicians follow safety protocols, minimizing the risk of accidents during repairs.
- Long-Term Reliability: Professional repairs focus on preventing future problems ensuring your appliance’s longevity.
- Cost-Effective Solutions: While there may be a service fee, professional repairs prevent further damage, ultimately saving money.
Cost considerations for professional services versus DIY repairs
Professional Services:
- Service Fee: Professional appliance repair services typically charge a service fee, which covers the technician’s time, expertise, and diagnostics. The cost varies according to the firm, area, and type of appliance.
- Labor Costs: Besides the service fee, you’ll incur labor costs for the repair work. Technicians charge hourly rates, and the total labor cost depends on the complexity of the repair.
- Parts and Materials: This will be an additional expense if your appliance requires replacement parts. However, professional technicians often have access to genuine parts and can secure them at a competitive price.
- Warranty Preservation: Professional repairs can help preserve your appliance’s warranty. This warranty protection can save you money on repairs if the issue recurs.
- Time Savings: Professional repairs are typically faster and more efficient. This can be especially crucial for essential appliances like refrigerators or washing machines, as it reduces downtime and inconvenience.
DIY Repairs:
- Cost of Parts: When you repair an appliance, you must purchase any necessary replacement parts. The cost of the parts can vary widely based on the appliance type and the specific components required.
- Tools and Equipment: DIY repairs may require specialized tools. If you don’t already own these, you’ll need to factor in the cost of purchasing or renting them.
- Learning Curve: DIY repairs often involve a learning curve, especially if you need to become more experienced in appliance repair. You should invest time and effort in research and learning to complete the repair correctly.
- Risk of Errors: Mistakes during a DIY repair can lead to further damage, potentially increasing repair costs. If you cannot resolve the issue, you may need to hire a professional, incurring additional expenses.
- Warranty Implications: Attempting DIY repairs can void your appliance’s warranty if it’s still in effect. This means you won’t have warranty protection for future issues.
- Safety Concerns: DIY repairs can pose safety risks, especially when dealing with electrical or gas appliances. Inadequate safety precautions can result in accidents or injuries.
While DIY repairs may seem cost-effective at first glance, it’s essential to consider the potential hidden costs, risks, and the value of your time. Professional services often provide efficient, reliable solutions with the benefit of warranty preservation and safety assurance. Ultimately, the choice between professional services and DIY repairs depends on your comfort level, expertise, and the specific circumstances of your appliance issue. Weighing the costs and benefits will help you make the most financially sound decision.
Call Appliance Cowboys For Reliable Samsung Appliance Repairs.
Are you experiencing issues with your appliances? Don’t worry; we understand your frustrations at Appliance Cowboys and are here to help. With our same-day repair services and a team of expertly trained technicians, we can effectively and efficiently fix any problem you may have. We have experience working with all major appliance brands and maintaining an extensive parts inventory, ensuring a quick turnaround time.
Our commitment to customer service sets us apart. You can expect professionalism, respect, and honesty from your initial call to when our technician arrives at your home. We value all our clients and offer a warranty on our services. If needed, we are happy to revisit any issues you may encounter.
Don’t let a malfunctioning Samsung appliance disrupt your day. Contact Appliance Cowboys today for reliable and efficient repair services. You’ll be pleased with the results!
We Work on All Appliance Types and Brands
Our trained technicians provide guaranteed appliance repair. We work on freestanding and built-in wine coolers by Koldfront, EdgeStar, Danby, Summit, Magic Chef, Marvel, U-line, Haier, Avanti, Amana, Maytag, Amcor, Artevino, Bosch, Cuisinart, Electrolux, Emerson, Frigidaire, GE, Jenn-Air, Sears, Kenmore, KitchenAid, LG, Samsung, Sub Zero, Wolf and more. Call us for the reliable wine cooler repair Houston residents count on.
Brands We Repair
We provide top notch maintenance service for all types of vehicles.
We are certified to service and repair the following makes:


Our Appliance Repair Services
Our professionals know how to handle a wide range of appliance repair services. We offer a full range from refrigerator repair to oven repair, dryer repair, and dishwasher repair. See Appliance Cowboys' full list of appliance repair services below. If you name it, we can repair it! We will even get your cat that is stuck in the tree.
Refrigerator Repair

Dryer Repair

Appliance Cowboys experienced and professional technicians provide effective dryer repair. We provide professional and reliable service to ensure your dryer can do its job right.
Oven Repair
When your oven stops working, don’t hesitate to contact us. At appliance Cowboys, we understand the frustration when your oven is giving you problems. We offer same day appliance repair so our trained professionals can fix your oven fast so you can get cooking!
Dishwasher Repair
If you are looking for a dishwasher repair company, the search is over. We have skilled technicians that are fully capable of fixing any dishwasher trouble you may be having. Don’t keep mopping up leaks or hand washing your dishes. Call us right away for same day dishwasher repair.
Cooktop Repair

We will be there for you when problems arise and you need a cooktop repair. Whether you have an induction, ceramic, gas, or electric cooktop, Appliance Cowboys will repair it guaranteed.
Range Repair
If your range stops working, you need reliable repair that is completed quickly. Our technicians can provide you with same-day service and provide fast repairs, so you can go back to enjoying your kitchen.
Garbage Disposal Repair
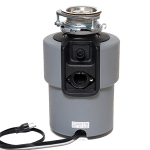
Garbage disposals make your life easier and less messy. Having to clean food residue from the sink is not ideal. If you need garbage disposal repair in Houston we can help. Our plumbers can take care of all your repair or replacement needs.
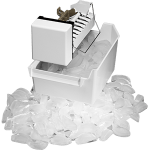
Ice Maker Repair
Trying to cook in a smoke or steam filled kitchen is near impossible. That’s why a working vent hood is so important. If your Vent Hood is giving you problems, call Appliance Cowboys for fast and reliable repairs.
Vent Hood Repair
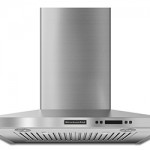
Trying to cook in a smoke or steam filled kitchen is near impossible. That’s why a working vent hood is so important. If your Vent Hood is giving you problems, call Appliance Cowboys for fast and reliable repairs.
Wine Cooler Repair
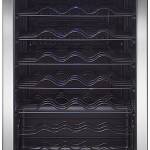
We understand the importance of keeping your wine at the perfect temperature. We are a leading wine cooler repair company for Houston and surrounding areas. No matter the size or brand of your wine cooler, we can fix it.
Sub Zero Repair
We focus on all elements of Sub Zero repair work and we are a #1 repair company for all high-end appliances. Our specialists are prepared to serve you whether you need maintenance in your house or in your workplace.
Washer Repair

We understand the urgency when you have 3 weeks load of laundry to for the family and Monday is around the corner. Our professional and experienced technicians specialize in washer repair for all major brands.