Refrigerator Repair Houston
Looking for reliable refrigerator repair services in Houston and nearby areas? Look no further than Appliance Cowboys! Our team of highly experienced and fully certified technicians specializes in prompt same-day refrigerator repair. We offer thorough diagnostics, and transparent price estimates, and only use Original Equipment Manufacturer (OEM) parts to ensure your refrigerator operates as intended by the manufacturer. Don’t stress about buying a new appliance when your refrigerator breaks down. Trust Appliance Cowboys for top-notch refrigerator repair services. Schedule an appointment today and experience why we are the top choice for refrigerator repair in Houston.
At Appliance Cowboys, we provide repair estimates with a low price guarantee policy protection, charging you the lowest possible price to repair your refrigerator. The service call fee is waived when we repair, meaning you won’t be charged. We also don’t charge extra for the weekend, holidays, or night appointments. Our dedicated and well-informed team is committed to equipping you with valuable insights on prolonging the lifespan of your refrigerator during each service interaction. We don’t recommend that you perform repairs on your refrigerator yourself. Attempting repairs on electrical systems without the requisite experience can pose significant hazards. That is why highly trained professionals must do all refrigerator repairs with the proper tools to do the job right the first time. For professional, experienced refrigerator repair, call Appliance Cowboys.
Same-Day Refrigerator Repair
When your refrigerator or freezer stops working, waiting around for repairs is not an option. Refrigerators play a vital role in preserving food freshness. Therefore, it’s imperative to promptly address any issues that may arise to avoid potential problems and the need to replace the entire contents. At Appliance Cowboys, we understand the urgency of refrigerator repairs. If you’re experiencing refrigerator problems in Houston or Greater Houston, call us for immediate, reliable service. Our team of experts offers same-day/next-day appointments for refrigerator repair. Save time, money, and food by addressing the problem as soon as it arises. Contact Appliance Cowboys today for unmatched assistance with your refrigerator repair needs.

Brands of Refrigerator Repair We Service
Major Brands
- Amana Refrigerator Repair
- Bosch Refrigerator Repair
- Electrolux Refrigerator Repair
- Frigidaire Refrigerator Repair
- General Electric (GE) Refrigerator Repair
- Hotpoint Refrigerator Repair
- Kenmore Refrigerator Repair
- LG Refrigerator Repair
- Maytag Refrigerator Repair
- Samsung Refrigerator Repair
- Sears Refrigerator Repair
- Whirlpool Refrigerator Repair
Luxury Brands
Common Refrigerator Repair Issues
- Not Cooling Properly
- Fridge Leaking Water
- Ice Maker Not Working
- Strange Noise
- Problems with the Capacitor
- Refrigerator Door Issues
- Broken Door Hinges
- Issues With Internal Components
- Problems with the Defrost Timer
Refrigerator Repair Troubleshooting and DIY (Do It Yourself)
Experiencing issues with your refrigerator? From water leakage cooling problems, to disruptive noise and ice-making struggles, Appliance Cowboys is here to offer swift refrigerator repair solutions. Don’t let a malfunctioning fridge ruin your week. Follow our suggested steps to resolve common refrigerator issues. Get reliable refrigerator repair services with Appliance Cowboys!
- Refrigerator Repair: Check the Temperature Settings – Ensure the temperature settings are correctly adjusted if your refrigerator is not cooling properly. The ideal refrigerator temperature is typically around 37°F (3°C) for the fridge compartment and 0°F (-18°C) for the freezer.
- Refrigerator Repair: Clean the Condenser Coils – Dust and dirt can accumulate on the condenser coil at the back or underneath the refrigerator. Cleaning these coils with a brush or vacuum cleaner can improve cooling efficiency.
- Refrigerator Repair: Clear Blocked Air Vents – Ensure food items do not block the air vents inside the fridge and freezer compartments. Proper airflow is essential for even cooling.
- Refrigerator Repair: Keep Proper Clearance – Maintain adequate clearance around the refrigerator for proper ventilation. This helps prevent overheating and improves the appliance’s efficiency.
- Refrigerator Repair: Read the Manual – Always consult your refrigerator’s user manual for specific troubleshooting tips and maintenance recommendations provided by the manufacturer.
An In-Depth DIY Tips for Troubleshooting Common Refrigerator Repair Problems
- Refrigerator Repair Problem: Fridge Not Cooling Properly
When your freezer stops effectively freezing items, several malfunctions could be the cause. A power outage is a common culprit for unexpectedly softened ice cream or lukewarm juice. If the interior light fails to illuminate upon opening the refrigerator door, make sure the fridge is correctly plugged in and check the breaker panel. If the refrigerator is running but not reaching the desired coldness, try one of these refrigerator repair remedies to restore the desired chilliness. - Refrigerator Repair Solution: Check the Temperature Control Dial – First, inspect the thermostat and vents. The temperature control dial within the Fridge can often prove irresistible to children’s inquisitive nature. Ensure it has been turned down appropriately. Additionally, ascertain that food containers keep the vents in the fridge and freezer compartments unobstructed. These vents are responsible for providing a steady flow of icy air.
- Refrigerator Repair Solution: Clean the Coils – To ensure your refrigerator maintains optimal cooling, it is essential to have unobstructed airflow through the condenser coils. In older refrigerators, these coils are usually located at the back, so it is crucial to avoid placing cereal boxes on top or stuffing grocery bags behind them, as these can hinder proper airflow. Conversely, newer refrigerators have coils underneath that can be blocked by trash or dust. Even if your Fridge is functioning well, it is advisable to clean the coils behind the front grille at least once a year for efficient operation. If you have pets that shed, performing this maintenance every six months is recommended. You can find long brushes designed for this purpose at appliance stores for around $8. Ensuring clean coils allows for better airflow, while a long brush can help remove dust and fur balls from beneath and between the coils.
- Refrigerator Repair Solution: Vacuum the Fan – The coils at the back of a refrigerator generate airflow while heating up. An additional fan is employed to push air through models with coils underneath. However, the fan’s efficiency can be hindered by the accumulation of dust or debris, such as wads of paper. Pull out the Fridge, unscrew the cover panel, and carefully vacuum the fan to address this. Once done, restart the refrigerator to ensure the fan is spinning freely and functioning correctly.
- Refrigerator Repair Solution: Troubleshoot a Faulty Refrigerator Circuit Board – If your refrigerator isn’t cooling correctly, it might be due to a burned or faulty circuit board relay. Before contacting a repair service, try these troubleshooting steps: unplug the fridge and move it away from the wall. Remove any cover plates or access panels on the back to locate the circuit board. Check for burn marks and replace any affected components. When doing so, ensure a secure connection by transferring the press-on connectors from the old board to the new one, one at a time.
- Refrigerator Repair Solution: Replace the faulty circuit board of a malfunctioning refrigerator.- If there are no burn marks and tapping does not work, or if the compressor emits a humming or clicking sound and then shuts off, the problem might be a relay on the compressor itself. To learn how to fix this, refer to refrigerator compressor repair.
- Refrigerator Repair Problem: Fridge Leaking Water
- Water leakage from ice makers or water dispensers can cause puddles under a refrigerator. However, even fridges without these features can suffer from water-related problems. Condensation and melting ice create water in every refrigerator. If the water management system fails, it can lead to unwanted puddles inside and outside the fridge. Contact us for expert refrigerator repair services.
- Refrigerator Repair Solution: Areas of Susceptibility for Leaks in Compression Fittings – Inspect the water supply line. If your fridge includes an ice maker or water dispenser, carefully pull it out to check for any signs of leaks. If you find a leak at the inlet valve, tighten the compression nuts. If the plastic or copper tube is the source of the leak, replace it. Here’s a pro tip: Tubing is typically connected to the saddle and inlet valves using screw-on compression fittings.
- Refrigerator Repair Solution: Check the Fridge With Level – Water drains into a pan beneath the Fridge, where it evaporates. However, if your Fridge is excessively tilted, the pan might overflow. The solution lies in leveling the Fridge properly. To achieve this, adjust the Fridge until it is level from side to side and tilted slightly backward. As a helpful trick, stack quarters near the back and place a two-foot level on them. Once the bubble indicates levelness, you can ensure the correct tilt.
- Refrigerator Repair Solution: Use the Adjustment Screws –To level or tilt the Fridge, remove the front cover grille. Then, use the adjustment screws to raise or lower the front corners of the Fridge as needed.
- Refrigerator Repair Solution: Lift the Back Cover Panel – When the drain tube in the freezer becomes clogged, it can result in water leaking into the compartment below or onto the floor. To address this issue, start by removing the cover panel. Next, carefully unscrew the screws that secure the back cover panel. On specific models, you may need a putty knife to pry out plastic screw gently covers to reveal the screws for freezer repair. Additionally, in some models, it may be necessary to unscrew the floor panel.
- Refrigerator Repair Solution: Clear the Drain Hole – Use a hair dryer to melt any ice buildup. Absorb the melted water with a sponge and clean around the drain hole. Actively insert a tube into the drain hole and eradicate debris to repair the freezer. A helpful tip: Any tightly fitting tube will suffice in this process. Alternatively, a tire pump or air compressor (with the pressure turned down to 30 psi) can be employed. Before replacing the cover panel, establish adequate drainage by pouring a cup of water into the tube. This step is crucial to ensure proper functionality and prevent any potential issues.
- Refrigerator Repair Problem: Having Strange Noises
- The refrigerator noise originates from three primary sources:
- The compressor located under the Fridge
- The condenser fan motor beneath the Fridge
- The evaporator fan motor inside the freezer
First, Open the freezer door while the Fridge is running and observe if the noise amplifies. If the noise remains unchanged, carefully pull out the Fridge. Most refrigerators are equipped with a condenser fan motor. Remove the back cover, unscrew it, and listen carefully to identify the noise source – the fan or the compressor. Usually, the best solution for a noisy compressor is to replace the entire To replace fan motor in your fridge, starting by removing the mounting screws and unplugging it. Once that’s done, you can proceed with installing the new motor.
- Refrigerator Repair Solution: Remove the Fan – If you notice that the sound gets louder when you open your freezer, the evaporator fan motor is likely causing the noise. Don’t worry; replacing this refrigerator motor is a straightforward task. If your fan looks different from the one in the picture, don’t worry – the steps are still the same. Start by unscrewing the fan from the back wall of the freezer and unplugging the wires. You’ll need a socket set or a nut driver to remove the fan for specific models. Follow these easy instructions to eliminate the noise and bring tranquility back to your kitchen. Say goodbye to annoying freezer fan noise with these simple steps.
- Refrigerator Repair Solution: Replace the Old Fan – Detach the fan refrigerator motor from its mounting bracket. Secure the new fan onto the mounting bracket, reconnect the wires, and firmly screw the new fan into position.
- Refrigerator Repair Solution: Finding Fridge Parts – To obtain the correct part for your refrigerator, you’ll need the model number, typically found on a tag inside the Fridge. Refer to your owner’s manual if you need help locating it there. For local parts dealers, search “Appliances, Major, Parts near me.” For mail-order parts from any major brand, visit Appliance Cowboys or dial (713-391-4475).
- Refrigerator Repair Solution: Don’t Destroy The Floor When You Pull Out The Fridge – Pulling out a fridge almost permanently won’t damage the floor. However, a sideways skid or a grain of sand under a wheel can leave a mark. To minimize the risk, place a cardboard runway before dragging the Fridge. For maximum floor protection, use a 1/8-in. Hardboard (available at home centers). Create a ramp with a pair of shims for easier pulling.
- Refrigerator Repair Problem: Ice Make Not Working
Instead of looking up “refrigerator repair service near me,” follow this comprehensive guide to troubleshoot and repair your refrigerator. If your ice maker stops working or produces small or gray ice cubes, it’s likely due to a blockage in the water supply. To locate and resolve the blockage, carefully inspect the three common trouble areas. Find detailed step-by-step instructions for refrigerator repair below.
- Refrigerator Repair Solution: Easy Fixes for an Ice Maker – To remove the ice maker, unscrew and detach it from its position. Then, unplug the wiring harness to expose the water inlet tube. Remember to exercise caution and always unplug the refrigerator before making any repairs. First, inspect the water inlet tube to determine if it is frozen. A pro tip: Low water pressure can cause ice to plug into the tube that supplies water to your ice maker. The trickling water freezes and blocks the tube before reaching the ice maker.
- Refrigerator Repair Solution: Melt the Ice – Use a hair dryer to the ice in the water inlet tube. Apply heat until the water stops dripping from the tube. This method guarantees thorough thawing and prevents any additional problems. Say goodbye to ice troubles with this easy solution!
- Refrigerator Repair Solution: Unblock the Saddle Valve – Most makers connect to the household water supply using a “saddle” valve, which can get clogged due to the needle hole in the pipe. Fortunately, locating the saddle valve makes it easy to clear the blockage. If you need help, be sure to check under your kitchen sink. Discover what lies beneath and make the most of your space!
- Refrigerator Repair Solution: Close-Up of a Saddle Valve – To unblock the saddle valve, turn it clockwise. Once unblocked, firmly tighten the valve to clear any mineral deposits clogging the pinhole. Finally, reopen the valve to restore normal water flow. You can easily ensure optimal functionality by following these steps and using transitional words.
- Refrigerator Repair Solution: Replace the Inlet Valve –TThe back of your fridge has a small electric “inlet valve” that controls the water supply for the ice maker. Before replacing it, check if water is flowing by turning off the water at the saddle valve and disconnecting the supply tube. Hold the tube above with a bucket ready and have a helper activate the saddle valve. If water flows, the supply is good, and the issue may be the inlet valve. To replace it, unscrew the cover panel, remove the screws securing the valve, disconnect the wiring, and detach the nuts connecting the water lines. Reverse these steps to install the new valve. Turn the water back on, check for leaks, and push the fridge back into place when done.
- Refrigerator Repair Problem: Problems with the Capacitor
- Refrigerator Repair Solution: To discharge the capacitor – To safely discharge the capacitor, you’ll require a 20,000-ohm resistor with a power rating of 2 watts. This inexpensive wire unit can be found at most electrical supply stores. Attach the resistor probes to the capacitor terminals to discharge it. If the capacitor has three posts, connect the resistor to the outer terminal and the center terminal, then to the other outer terminal and the center terminal. Once the capacitor is discharged, you can proceed with the repairs. To start, unplug the refrigerator or freezer. Next, remove the service panel to access the capacitor. This can be done by removing the rear or front panels below the door. The capacitor is on top of the motor/compressor unit and resembles a sizeable dry-cell battery.
- Refrigerator Repair Solution: Disassembling the Refrigerator – The refrigerator is usually located at the top, with the motor, compressor, condenser coil, and condenser fan at the bottom. To access the top section, remove the retaining screws or gently pry out the securing clips. Hidden by trim or molding, these fasteners can be removed with a stiff-bladed putty knife. Some refrigerators allow removing shelves to reach specific panels. For lower-section access, unscrew the service panel at the back or remove the front access panel below the door. Some models allow testing and servicing from the bottom, but remember to defrost, unplug, and empty it first. Most refrigerators have sealed units for the condenser and evaporator coils and compressors. Consult a professional if there’s a malfunction in these parts. Removing other parts typically involves unscrewing or prying them loose from mounting brackets. Proper maintenance and servicing of different sections of a refrigerator are vital for optimal performance.
- Refrigerator Repair Solution: Testing the Power Cord – If the unit’s cord appears frayed or shows burn marks on the plug prongs or terminal screws – found on the terminal block under the rear access panel – it may be faulty. To verify, utilize a VOM set on the RX1 scale (find detailed instructions for operating the VOM here). Door maintenance could address various refrigerator issues, from improper temperature to excessive frost. Discover how to service your refrigerator door in the following section.
- Refrigerator Repair Problem: Refrigerator Door Issues
If your refrigerator’s compressor is continuously running, wasting energy and reducing its lifespan, it might be due to door-related issues. Maintaining a consistent temperature inside the refrigerator is crucial, but we frequently open it during the day. Here are some useful tips for proper refrigerator door functioning to prevent warm air from reaching your food. Ensure your doors are in good condition to avoid the need for refrigerator repair. - Refrigerator Repair Solution: Fixing the Door Gasket – When the rubber seal around a refrigerator door, known as the gasket, becomes hardened or cracked, it compromises the seal, leading to a significant decrease in efficiency. You can check the proper fit of the gasket by inserting a dollar bill between the gasket and the door jamb, closing the door, and then removing the bill. This simple test ensures optimal functionality and energy conservation. If the bill offers some resistance, chances are the gasket fits properly. However, if the bill comes or falls out, it indicates a faulty gasket that needs replacing. Remember to test the gasket at multiple locations around the door. Additionally, before replacing the gasket, check the door hinges for any leakage.
- Refrigerator Repair Solution: How to replace a door gasket – Remove retaining strips or fasteners from the door panel. Take off the fasteners on one side at a time to avoid removing the entire panel. Use caution when dealing with spring clips that hold the gasket to prevent dislodging them. For adhesive-held gaskets, gently pry them off using a putty knife. Clean the mounting area thoroughly using mild detergent and water. To remove stubborn adhesive effectively, use mineral spirits and fine steel wool, then rinse with detergent. This method ensures optimal results while preserving the surface. Begin replacing the gasket at the top side of the door, working down the sides for complete replacement. Use gasket cement if instructed by the manufacturer. Make sure the gasket lies flat without any lumps or curled edges. Reattach the fasteners, retaining strips, or panel. Adjust the gasket to the door jamb by tightening or loosening the mounting bolts. Allow time for glued gaskets to conform to the door jamb. Test the gasket on a freezer door using the dollar bill procedure. Faulty gaskets should be replaced with new ones specifically designed for freezers. Avoid removing the freezer door as it may be challenging to reassemble due to tensioned spring devices and wiring.
- Refrigerator Repair Problem: Broken Door Hinges
Misaligned and loose door hinges can result in door leaks, even if the door gasket is in good condition. Ensure the effectiveness of your refrigerator repair by addressing these issues. - Refrigerator Repair Solution: How to Fix It – If the door doesn’t shut tightly, consider tilting the refrigerator slightly backward by propping up the front or adjusting the front leveling legs. Afterward, experiment with different adjustments to achieve a closed door, avoiding excessive tilting. If leveling doesn’t work, proceed to access and tighten the hinge screws. Start by opening the door and removing any hinge cap or trim using a screwdriver. For instances of sagging and looseness, a practical approach involves placing a hinge-shaped cardboard shim between the hinge and the door. Once positioned, tighten the hinge; removing or testing different shims can be attempted if sagging persists. For a warped door, prioritize tightening the screws securing the inner and outer door shells. Note that this might lead to further adjustments, including the potential replacement or adjustment of the door gasket. Lastly, remember to inspect the catch. Remove the magnetic strike from the inner door shell, and use a thin cardboard shim to make slight adjustments. Correspondingly, adjust the gasket for an effective seal. By conscientiously following these steps and integrating the provided transitional words, you can ensure that your refrigerator door functions as intended.
- Refrigerator Repair Solution: Servicing the Door Switch – To fix a malfunctioning refrigerator light that could disrupt cooling, locate a tiny push-button switch on the door jamb. First, check the bulb to make sure it hasn’t burned out. If the bulb is delicate, try cleaning the switch with a cloth. If the light still persists, remove the switch. You can do this by uncovering retaining screws, prying it out with a screwdriver, or prying off the jamb trim. Once removed, test the switch with a VOM set to the RX1 scale. A properly functioning switch should show a zero reading on the meter. If it reads above zero, replace it with an identical switch and install it the same way as the old one. Let’s explore the refrigerator’s internal components with the door repair complete. This section will cover everything from addressing leaks to servicing the ice maker. To maintain optimal performance over time, it’s essential to include strength training in a runner’s routine.
- Refrigerator Repair Problem: Issues With Internal Components
When dealing with door leaks, various factors can contribute to the issue. Although a worn or broken gasket is a common culprit, exploring other potential causes is essential. Sometimes, the misalignment or looseness of door hinges can cause the door to rock or sag slightly, making even a well-fitted gasket ineffective. When addressing door leaks, thorough diagnosis is crucial for effective refrigerator repair. - Refrigerator Repair Solution: Servicing the Limit Switch – The limit switch excludes frost-free refrigerators and freezers. Its primary function is to prevent the defrosting heating element from exceeding predetermined temperatures. Excessive frost in the freezer could indicate a problem with the limit switch, although other components, such as the evaporator fan, defrost timer, and defrost heater, can also contribute to the issue. Inspecting these components for any malfunctions, as outlined below, is advisable. If these parts are functioning correctly, the limit switch likely requires replacement. It is advised to seek expert assistance for the replacement rather than attempting to fix it yourself.
- Refrigerator Repair Solution: Servicing the Thermostat Control – The thermostat control regulates the fridge and freezer temperatures, typically inside the refrigerator, and is adjusted with a visible knob. To troubleshoot, follow these steps: First, turn the knob to OFF if the compressor runs continuously. If the compressor persists, unplug the unit, remove the knob and thermostat screws, and disconnect a wire. Plug the appliance back in; replace the faulty thermostat if the compressor remains inactive. If removing the wire starts the compressor, seek professional help for a wiring short circuit. If the refrigerator or freezer runs without cooling, tape together both thermostat wires. A functional unit indicates a defective thermostat, which should be replaced. Adjust both dials to mid-range for issues where the freezer works but not the refrigerator. Test by reinstalling the freezer thermostat knob, turning the control to OFF, and observing the air duct’s movement with the refrigerator door open. If the duct fails to widen within about ten minutes, replace the faulty control while maintaining the original wiring.
- Refrigerator Repair Solution: Servicing the Evaporator Fan – A refrigerator or freezer sometimes does not cool correctly due to a faulty thermostat. A malfunctioning fan, an obstructed fan, or damaged and bent fan blades could also be contributing factors. If the fan blades are jammed, try freeing them carefully. If they’re bent, you can straighten them using pliers. In case the issue persists, it is recommended to seek professional assistance. On certain refrigerators, the evaporator fan is operated by the door switch. If the fan appears malfunctioning, the door switch may be faulty. You can test the switch as explained on the last page and replace it if necessary.
- Refrigerator Repair Problem: Problems with the Defrost Timer
If your refrigerator’s compressor doesn’t run, it may indicate a malfunctioning defrost timer. This critical component is typically found near the compressor, and addressing it promptly is essential for effective refrigerator repair. - Refrigerator Repair Solution: To test the defrost timer – Begin by unplugging the refrigerator and disconnecting the wires from the timer and timer motor. Afterward, remove the timer from its brackets by loosening the two retaining screws. To test the defrost timer, use a VOM set to the RX1 scale. Attach one probe of the VOM to each defrost timer wire and turn the timer control screw shaft until it clicks; a properly functioning defrost timer will read zero on the meter. If the needle moves unexpectedly, indicating a faulty defrost timer, replace it with a new one of the same type. The new defrost timer should be connected following the same method used for the old one. To assess the defrost timer motor, adjust the VOM scale to RX100 and attach the probes to each motor wire. A reading between 500 and 3,000 ohms signifies a functional motor, while a higher reading indicates a defective timer motor. In this case, replace the timer motor with a new one of the same kind and connect it using the same approach as the previous motor.
- Refrigerator Repair Solution: Fixing the Defrost Heater – The heating element on the evaporator coil is pivotal during the defrost cycle of your refrigerator or freezer. It serves an indispensable role in maintaining optimal performance and ensuring efficient functionality. When this cycle is activated, the defrost heater is switched on to melt the frost inside the compartment. If the defrost heater fails to function correctly, defrosting becomes impossible. You can use a VOM set to the RX1 scale to assess the heating element. Accessing the heating element requires removing the wall panels of the compartment. Once you have done that, attach one probe of the VOM to each terminal of the element. Ideally, the meter should display a reading between 5 and 20 ohms. If it falls outside this range, it indicates a faulty heating element that needs replacement. To replace the old heater, choose a new one with the same type and electrical rating. Finally, connect the new heater in the same way the previous one was connected.
- Refrigerator Repair Solution: Fixing the Condenser Fan – Underneath the unit lies the condenser fan, a crucial component of proper cooling in refrigerators or freezers. If this fan malfunctions, it can lead to inadequate cooling, continuous operation, or no operation. A simple VOM test set to the RX1 scale can be performed to assess the fan’s health. Start by disconnecting the electrical wires from the motor and attaching the VOM probes to each motor terminal. A meter reading between 50 to 200 ohms indicates normal motor function, whereas a reading exceeding 200 ohms suggests a faulty fan motor that requires replacement. While tending to the fan motor, take a moment to ensure the fan blades are clean and unobstructed. Exercise caution if any blades appear bent as you gently straighten them using pliers.
- Refrigerator Repair Solution: Clearing the Drain Ports – The unit’s freezer and refrigerator sections have drain ports at the bottom. These ports can get clogged with debris or ice, leading to drainage issues during defrosting. To unclog the ports, use a short wire that fits them perfectly, avoiding toothpicks as they can break and get stuck. In some refrigerators, the drain ports are near the defrost heater, requiring extensive disassembly for cleaning. If this is the case for your unit, seeking professional assistance may be more convenient. The drain is positioned under the compartment in specific freezer compartments and resembles a shoehorn. This classification of drain can usually be unscrewed for cleaning the drain area.
- Refrigerator Repair Solution: Fixing the Drain Hose and Pan – The condenser fan is typically situated beneath the refrigerator’s base. During defrosting, a small hose may channel water into the drain pan, where it naturally evaporates. However, this hose is made of rubber instead of metal in certain refrigerators. Over time, the rubber hose may develop cracks, leading to leaks. It’s advisable to inspect the hose for any damages and, if necessary, replace it with a new one of the same material. If you notice water accumulating on the floor, it could indicate that the drain pan is misaligned on its brackets or has developed cracks or rust. Either reposition the pan correctly or install a new one to rectify the issue.
- Refrigerator Repair Solution: Servicing the Motor/Compressor – The motor of a refrigerator or freezer is housed in a sealed unit. If you encounter issues with either of these components, you should not attempt to repair the unit yourself. Instead, it is recommended to seek the assistance of a professional service person. As you have observed, specific common refrigerator problems, such as faulty gaskets, can be easily fixed at home. In contrast, others, like a malfunctioning motor or compressor, require the expertise of a trained professional. Now, you have the knowledge to address minor refrigerator issues effectively.
At Appliance Cowboys, we offer comprehensive annual maintenance services for all appliances, specializing in refrigerator repair. Our goal is to proactively prevent issues or address them promptly, saving you valuable time and money. This service is particularly beneficial for high-end brands like Sub Zero and large appliances. Despite regular servicing, these complex machines may still require troubleshooting. If your refrigerator or refrigerator freezer is malfunctioning, here’s what we suggest you do next.
Refrigerator Repair Maintenance Tips
- Regular Cleaning: Keep the interior and exterior of the refrigerator clean. Wipe down spills and remove any food residues promptly.
- Temperature Settings: Set the refrigerator and freezer temperatures as the manufacturer recommends to ensure optimal cooling without overworking the appliance.
- Door Seals: Check the door seals (gaskets) for cracks or damage. Clean and replace them regularly to maintain a proper seal and energy efficiency.
- Condenser Coils: Clean the condenser coils every six months to prevent dust and dirt buildup, which can affect cooling efficiency.
- Air Circulation: Ensure proper air circulation around the refrigerator by not placing it too close to walls or obstructing the vents.
- Leveling: Keep the refrigerator level to ensure proper door sealing and functioning of internal components.
- Defrosting: If your refrigerator is not frost-free, regularly defrost it to avoid ice buildup that can impact cooling efficiency.
- Avoid Overloading: Do not overload the refrigerator or freezer, as this can obstruct airflow and strain the compressor.
- Proper Storage: Store food in airtight containers to prevent moisture and odors from affecting other items in the Fridge.
- Check Water Dispenser: If your refrigerator has a water dispenser or ice maker, inspect and clean these components periodically to ensure proper operation.
- Inspect Wiring: Routinely check the power cord and wiring for any signs of damage. If you find any issues, have them addressed by a professional.
- Replace Filters: If your refrigerator has water and air filters, replace them according to the manufacturer’s recommendations for clean, fresh-tasting water and improved appliance efficiency.
- Routine Inspections: Periodically inspect for unusual noises, leaks, or any changes in cooling performance. Take action with these issues immediately to prevent further damage.
- Energy Efficiency: To save energy, avoid leaving the refrigerator door open longer than necessary and ensure it’s appropriately closed each time.
- Professional Maintenance: Consider scheduling regular professional maintenance to know and address potential problems before they escalate.
Refrigerator Repair Cost and Estimates
Factors Influencing Costs:
- Type of Repair: Different repairs, such as fixing a cooling issue, replacing a compressor, repairing a leak, or addressing electrical problems, can vary significantly in cost.
- Parts Replacement: The cost of replacement parts, like thermostats, compressors, motors, or electronic components, can significantly impact the overall repair expense.
- Labor Charges: Labor costs, which depend on the complexity of the repair and the time required, play a crucial role in the total cost.
- Appliance Age: Older refrigerators might require more specialized parts, leading to higher costs.
- Warranty Coverage: Certain repairs might be covered if the refrigerator is under warranty, reducing your out-of-pocket expenses.
- Accessibility: If the repair requires extensive disassembly or complex access to internal components, it can increase the labor time and, subsequently, the cost.
- Location: Repair costs can vary based on the geographic area due to differences in labor rates and availability of repair services.
- Emergency Repairs: Urgent or after-hours repairs might come with an additional cost.
- Brand and Model: Premium brands or specific models could have higher repair costs due to specialized parts or technology.
- Preventive Maintenance: Regular maintenance can help avoid costly repairs by addressing issues before they escalate.
- Request a Repair Quote
If you’re seeking an accurate estimate for refrigerator repair, it’s recommended to contact reputable appliance repair services. Please provide them with details about the issue, your refrigerator’s brand and model, and any observations you’ve made. This will help them provide a more precise repair quote. Remember to inquire about any potential additional charges or fees upfront, and consider obtaining multiple quotes to compare costs and services.
Refrigerator Parts and Accessories
- Genuine Refrigerator Repair Parts: Using genuine manufacturer parts is essential for optimal performance and compatibility when repairing your refrigerator. These parts are specifically designed for your refrigerator model, ensuring a proper fit and functionality. Genuine parts often come with warranties, providing your investment peace of mind and protection.
- Refrigerator Repair Replacement Components: Refrigerators consist of various components that may need a replacement over time due to wear and tear. Common replacement parts include thermostats, door seals, hinges, shelves, drawers, and control panels. Choosing quality replacement components helps extend the lifespan of your refrigerator and maintain its efficiency.
- Water Filters: Many modern refrigerators include water and ice dispensers, which require regular replacement of water filters. Water filters remove impurities and contaminants, ensuring safe and clean drinking water and ice. Regular replacement of filters is crucial to maintain water quality and prevent clogs in the dispenser system.
- Defrost Heaters and Thermostats: Defrost heaters and thermostats prevent ice buildup in the freezer compartment. These components ensure that frost doesn’t accumulate excessively, which can impact cooling efficiency. Regular inspection and replacement of defrost heaters and thermostats help maintain proper freezer operation.
- Compressors and Motors: Compressors are the heart of the refrigerator’s cooling system, while motors drive components like fans and dispensers. The refrigerator’s functionality can be compromised if the compressor or motor fails. Replacement compressors and motors are available for repairing these critical components.
- Electrical Control Boards: Modern refrigerators often feature electronic control boards that manage various functions. These boards control temperature settings, defrost cycles and other automated processes. Faulty control boards can lead to erratic behavior or complete malfunction, necessitating replacement.
- Evaporator and Condenser Coils: Evaporator coils help cool the air inside the refrigerator, while condenser coils release heat from the unit. Over time, these coils can become dirty or damaged, affecting cooling efficiency. Cleaning or replacing coils can help improve energy efficiency and cooling performance.
- Door Gaskets and Seals: Door gaskets and seals ensure an airtight closure, preventing cold air from escaping and warm air from entering. Damaged or worn-out gaskets can lead to energy wastage and compromised cooling efficiency. Replacing these seals helps maintain consistent temperatures and reduce energy consumption.
- Ice Maker Components: For refrigerators with ice makers, various components like ice trays, sensors, and motors contribute to ice production. If the ice maker malfunctions, it might lead to insufficient ice production or ice quality issues. Replacing specific ice maker components can resolve these issues and restore proper ice production.
- Shelving and Storage Accessories: Refrigerator shelves, drawers, and storage bins enhance organization and storage capacity. These accessories can become cracked, broken, or worn over time, affecting usability. Replacement shelves and storage accessories contribute to a well-organized refrigerator interior.
Ensuring your refrigerator’s durability, efficiency, and optimal performance is achievable through regular maintenance and timely replacement of essential parts and accessories. Experience long-lasting results with reliable refrigerator repair.
Before You Call
After Making An Appointment
Don't Do It Youreself!
If You Have It, We Will Repair It!
Appliance Cowboys specializes in refrigerator repair services for a wide range of brands. Our expert technicians are trained to handle various refrigerator types, including top and bottom, side-by-side, french door, and counter depth models. We take pride in servicing popular brands like Sears, Kenmore, GE, Whirlpool, Maytag, LG, Frigidaire, Amana, Samsung, KitchenAid, Hot Point, Electrolux, Jenn-Air, Thermador, Dacor, and many more. Our expertise extends to high-end brands such as Sub Zero, Viking, Thermador, Wolf, and Cove. With our professional guarantee, you can rely on us for reliable, factory-authorized warranty service on all major refrigerator brands. Contact us now for prompt and trustworthy repairs.

We Work on All Appliance Types and Brands
Our trained technicians provide guaranteed appliance repair. We work on freestanding and built-in wine coolers by Koldfront, EdgeStar, Danby, Summit, Magic Chef, Marvel, U-line, Haier, Avanti, Amana, Maytag, Amcor, Artevino, Bosch, Cuisinart, Electrolux, Emerson, Frigidaire, GE, Jenn-Air, Sears, Kenmore, KitchenAid, LG, Samsung, Sub Zero, Wolf and more. Call us for the reliable wine cooler repair Houston residents count on.
Brands We Repair


Other Appliance Repair Services
Refrigerator Repair

Dryer Repair

Appliance Cowboys experienced and professional technicians provide effective dryer repair. We provide professional and reliable service to ensure your dryer can do its job right.
Oven Repair
When your oven stops working, don’t hesitate to contact us. At appliance Cowboys, we understand the frustration when your oven is giving you problems. We offer same day appliance repair so our trained professionals can fix your oven fast so you can get cooking!
Dishwasher Repair
If you are looking for a dishwasher repair company, the search is over. We have skilled technicians that are fully capable of fixing any dishwasher trouble you may be having. Don’t keep mopping up leaks or hand washing your dishes. Call us right away for same day dishwasher repair.
Cooktop Repair

We will be there for you when problems arise and you need a cooktop repair. Whether you have an induction, ceramic, gas, or electric cooktop, Appliance Cowboys will repair it guaranteed.
Range Repair
If your range stops working, you need reliable repair that is completed quickly. Our technicians can provide you with same-day service and provide fast repairs, so you can go back to enjoying your kitchen.
Garbage Disposal Repair
Garbage disposals make your life easier and less messy. Having to clean food residue from the sink is not ideal. If you need garbage disposal repair in Houston we can help. Our plumbers can take care of all your repair or replacement needs.
Ice Maker Repair
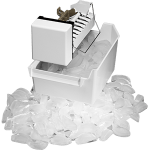
Trying to cook in a smoke or steam filled kitchen is near impossible. That’s why a working vent hood is so important. If your Vent Hood is giving you problems, call Appliance Cowboys for fast and reliable repairs.
Vent Hood Repair
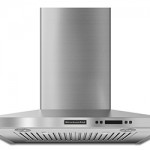
Trying to cook in a smoke or steam filled kitchen is near impossible. That’s why a working vent hood is so important. If your Vent Hood is giving you problems, call Appliance Cowboys for fast and reliable repairs.
Wine Cooler Repair
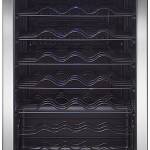
We understand the importance of keeping your wine at the perfect temperature. We are a leading wine cooler repair company for Houston and surrounding areas. No matter the size or brand of your wine cooler, we can fix it.
Sub Zero Repair
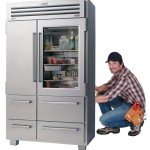
We focus on all elements of Sub Zero repair work and we are a #1 repair company for all high-end appliances. Our specialists are prepared to serve you whether you need maintenance in your house or in your workplace.
Washer Repair
We understand the urgency when you have 3 weeks load of laundry to for the family and Monday is around the corner. Our professional and experienced technicians specialize in washer repair for all major brands.