
How to Repair a Noisy Vent Hood: Quick Solutions
A noisy vent hood can be incredibly frustrating, especially when you’re just trying to cook in peace. Whether it’s a strange rattling, a loud buzzing, or a constant hum, it’s not only annoying but also a sign that something may be wrong. The good news is that many of the issues causing the noise are simple to fix, and with a little troubleshooting, you can restore your vent hood to its quiet, efficient self.
In this article, we’ll walk you through some common causes of a noisy vent hood and offer quick solutions to fix it. Suppose the issue persists after trying these fixes. In that case, you may need professional vent hood repair to get it back to working properly.
Why Is My Vent Hood Making Noise?
Understanding why your vent hood is making noise is the first step toward fixing it. A vent hood works by sucking up air and smoke from your kitchen and venting it outside, and several factors can interfere with its smooth operation. Some of the most common causes of noise in a vent hood include mechanical issues, a buildup of grease or debris, or even installation problems.
1. Fan Blades Need Cleaning or Replacement
The most common culprit of a noisy vent hood is the fan itself. Over time, the fan blades can accumulate grease, dust, and other debris, which can create an imbalance and cause noise. If the fan blades are damaged or warped, they can also create extra noise.
How It Affects the Vent Hood: Dirty or broken fan blades can make the motor labor harder and emit loud rattling or humming noises. Broken blades can also decrease the effectiveness of the vent hood in severe cases.
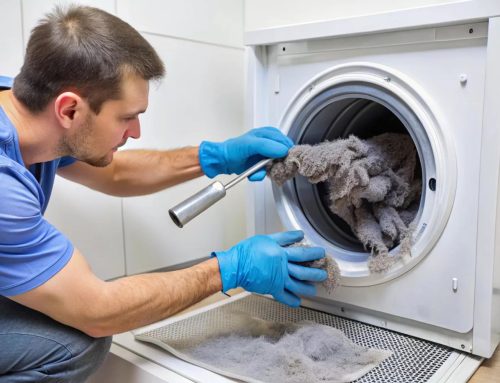
2. A Dirty or Clogged Filter
A clogged or dirty filter can disrupt airflow, causing the vent hood to work harder and make noise. The filter is designed to capture grease and particles, but if it becomes clogged with grease or dust, it can restrict airflow and create strange noises.
How It Affects the Vent Hood: When airflow is restricted, the fan has to work harder, which can result in a buzzing or humming noise. In some cases, it can even cause the motor to overheat, leading to further damage.
3. Loose Parts or Components
Over time, screws and other parts of the vent hood can loosen due to regular use or vibrations from the motor. Loose parts can create rattling or vibrating sounds, making your vent hood much noisier than usual.
How It Affects the Vent Hood: Loose parts, like screws or even panels, can cause parts of the vent hood to move or vibrate while the fan is on, which results in unwanted noise.
4. The Motor Is Wearing Out
If the motor of your vent hood is old or damaged, it can cause the fan to make unusual noises. A worn-out motor may struggle to turn the fan blades, resulting in a grinding or buzzing sound.
How It Affects the Vent Hood: An old or failing motor can lead to persistent noise, and in some cases, it can stop working altogether. If the motor is the issue, it might need to be replaced by a professional.
5. Installation Issues
If your vent hood wasn’t installed correctly, it could cause issues that lead to noise. For example, suppose the vent hood isn’t secured properly or isn’t aligned correctly with the ductwork. In that case, it can vibrate or make rattling sounds.
How It Affects the Vent Hood: Improper installation can cause the vent hood to be unstable, leading to vibrations and rattling noises. These noises can become louder over time as the issue worsens.
How to Fix a Noisy Vent Hood
Now that we’ve covered the possible causes of a noisy vent hood let’s look at some easy and quick solutions that you can try before calling a professional.
1. Clean the Fan Blades
- Step 1: Turn off the power to the vent hood by unplugging it or turning off the circuit breaker.
- Step 2: Remove the fan blades from the unit. If your vent hood has a removable fan, simply pull it out. If not, you may need to unscrew the fan assembly.
- Step 3: You can use a cloth or a brush to clean the fan blades. Remove any grease as well as debris that may have accumulated. You can use a mixture of soap and water or a commercial degreaser for tough grease.
- Step 4: Once the blades are clean, reinstall them and check if the noise has been reduced.
2. Clean or Replace the Filter
- Step 1: Turn off the power to the vent hood.
- Step 2: Remove the filter. Most vent hoods have a mesh or charcoal filter that can be easily pulled out.
- Step 3: Clean the filter with warm, soapy water to remove grease and debris. If the filter is too clogged or damaged, it’s best to replace it with a new one.
- Step 4: Once cleaned or replaced, reinstall the filter and test the vent hood to see if the noise persists.
3. Tighten Loose Parts
- Step 1: Turn off the power and remove any removable parts of the vent hood, such as the fan blades and filters.
- Step 2: Inspect the unit for any loose screws or components. Check the fan housing, motor, and any visible parts.
- Step 3: Use a screwdriver to tighten any loose screws. If any parts seem worn or damaged, replace them as necessary.
- Step 4: After tightening everything, test the vent hood to see if the noise has stopped.
4. Replace the Motor (If Necessary)
- Step 1: If the motor seems to be the problem, it might need replacing. This can be a more complex repair, so be sure to check the manufacturer’s instructions for your specific model.
- Step 2: Disconnect the power to the vent hood and remove the fan assembly to access the motor.
- Step 3: Unscrew the motor from its housing and replace it with a new one. You can order a replacement motor from the manufacturer or a certified supplier.
- Step 4: Reassemble the unit and test it to make sure the noise has been resolved.
5. Check for Installation Issues
- Step 1: If you suspect the installation is causing the noise, inspect the vent hood’s alignment and the ductwork.
- Step 2: Ensure that the vent hood is securely attached to the wall and the ductwork is aligned correctly.
- Step 3: Tighten any loose mounting brackets or screws. If the ductwork is too narrow or improperly installed, you may need to adjust it.
- Step 4: Test the vent hood to see if the noise has been eliminated.
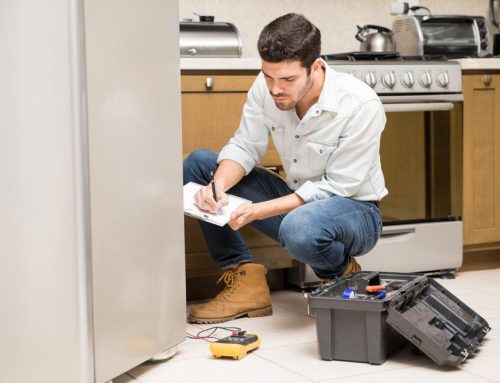
When to Call a Professional for Vent Hood Repair
While many of these fixes can be done yourself, some issues may require professional assistance. If the noise persists after you’ve tried the above steps or if you’re dealing with a malfunctioning motor, it’s time to call in an expert.
Signs you need a professional:
- The motor continues to make noise even after cleaning.
- The vent hood is still noisy despite tightening loose parts.
- The noise gets worse over time, or the motor stops working.
- You notice electrical problems or burning smells coming from the vent hood.
A professional appliance repair technician can help you diagnose the issue and provide a long-term solution, saving you time and hassle.
Preventing Noise in Your Vent Hood
Once your vent hood is quiet again, it’s important to maintain it to prevent future issues. Here are some tips to keep your vent hood running smoothly:
- Regularly clean the fan blades and filter to prevent grease buildup.
- Check the installation and make sure everything is secure.
- Replace the filter regularly to ensure proper airflow.
- Inspect the motor; there may be signs of wear and tear.
Keep Your Vent Hood Quiet and Efficient
A noisy vent hood can be really annoying, but you can usually fix it yourself with a few simple steps. Cleaning the fan blades or replacing the motor can help make it quieter. If the noise doesn’t go away, it’s time to call a professional for vent hood repair. An expert from Appliance Cowboys can take care of the problem. Keeping your vent hood clean and well-maintained will help it work properly for many years. Schedule an appointment with us today!


