How to Clean Your Dryer Vent During Fall
As the crisp autumn air rolls in, you likely find yourself using your dryer more frequently. The fall season is an ideal time to clean your dryer vent to ensure it’s operating safely and efficiently. Dryer vents clogged with lint and debris not only cause your dryer to work harder but also pose a serious fire hazard. In this fall-specific guide, we’ll walk you through the process of cleaning your dryer vent, making sure your home is safe, and your dryer performs at its best throughout the cooler months.
Understanding How Dryer Vents Work
Before jumping into the cleaning process, it’s important to understand how dryer vents function. Your dryer vent is designed to expel hot air and moisture during the drying cycle. This vent connects to a duct leading outside your home, allowing moisture and lint to be removed. Over time, lint and debris accumulate, blocking airflow and creating potential hazards—especially when the vent is clogged as we head into the colder months when dryers are used more frequently.
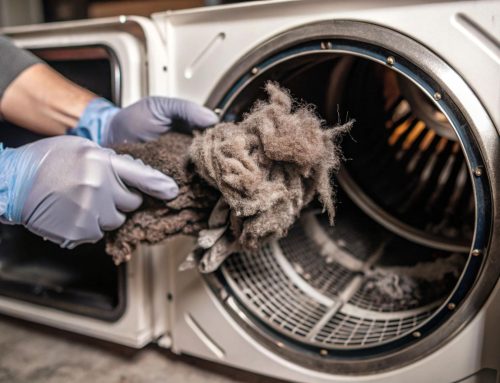
Why Fall Is the Best Time to Clean Your Dryer Vent
The fall season is a perfect time to tackle dryer vent maintenance because:
- Increased dryer use: Colder weather means more laundry loads, as heavier clothing like sweaters and blankets take longer to dry.
- Fire hazard prevention: Fall also marks the start of holiday season preparations, when dryer fires become a more significant concern.
- Winter readiness: Prepping your dryer vent for winter ensures your dryer runs efficiently when it’s most needed, saving energy and preventing breakdowns.
Why It’s Important to Clean Your Dryer Vent
Cleaning your dryer vent during fall is critical for several reasons:
- Fire hazards: Lint is very flammable, and if it builds up in your dryer vent, it can catch fire and cause house fires. Since fall is when we start using home heating systems, it’s even more important to reduce the chances of a fire happening.
- Reduced drying efficiency: A clogged vent reduces airflow, which means your clothes take longer to dry, and your dryer consumes more energy.
- Extended dryer lifespan: Regularly cleaning the vent reduces strain on the dryer’s components, extending its overall life.
- Energy savings: By cleaning your dryer vent, your dryer can work easier, which helps lower your energy costs.
Signs That Your Dryer Vent Needs Cleaning This Fall
Before you start cleaning, look out for these indications that your dryer vent needs some cleaning:
- Longer drying times: If your clothes are taking more than one cycle to dry, your vent might be clogged.
- Excessive heat: Is your dryer becoming too hot to touch during a cycle? That could indicate a blockage.
- Burning smells: A burning odor is a serious sign that lint may be overheating inside the vent.
- Visible lint around the dryer or vent area: Lint accumulating around the exterior vent indicates the need for a cleanout.
Tools You’ll Need for Cleaning
The good news is that cleaning your dryer vent doesn’t require a lot of tools. Here’s what you’ll need:
- Dryer vent brush kit: Available at most hardware stores, these brushes are specially designed for dryer vents.
- Vacuum cleaner: Useful for removing lint and debris from the vent.
- Screwdriver: Necessary for removing the vent cover.
- Ladder: If your exterior vent is located higher up on your home’s exterior wall, a ladder will help you access it.
Steps in Cleaning Your Dryer Vent
Ready to get started? Have these simple steps to ensure a clean and efficient dryer vent:
- Step 1: Disconnect the dryer from power. Before doing anything else, unplug your dryer to prevent electrical accidents. If your dryer is gas-powered, make sure to turn off the gas supply as well.
- Step 2: Locate the dryer vent. Find the vent that connects your dryer to the outside duct. This is typically located at the back of the dryer.
- Step 3: Remove the dryer vent cover. Use a screwdriver to take off the vent cover from the back of the dryer. Make sure you don’t rip or damage the duct while doing it.
- Step 4: Clean the dryer vent duct. Insert your dryer vent brush into the duct and rotate it to dislodge and remove lint. You can also use a vacuum to help suck up any remaining debris.
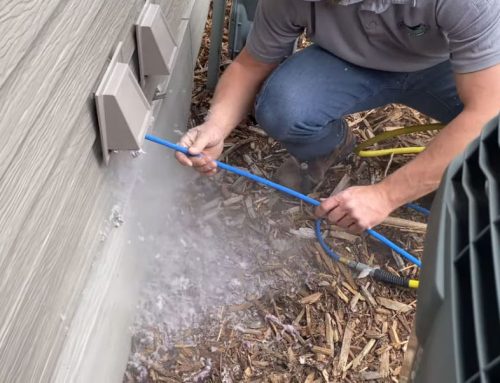
- Step 5: Clean the outdoor vent. Go outside to the vent and use a dryer vent brush to remove any lint that’s built up. If the vent is high up on the wall, you might need a ladder to reach it.
- Step 6: Reconnect the dryer and test it. Once you’ve cleaned both ends of the vent, reattach the vent cover, plug your dryer back in, and run a test drying cycle to ensure everything works properly.
Frequently Clean Your Dryer Vent for Fall
During fall, it’s a good idea to clean your dryer vent more frequently—especially if you have a large family or do laundry often. A thorough cleaning every 6-12 months is typically recommended, but you may need to clean it more often during colder months when the dryer is working harder.
DIY Dryer Vent Cleaning vs. Professional Service
While DIY dryer vent cleaning is cost-effective, there are times when it’s best to call a professional. Fall is a busy season for appliance use, and professional services can give you peace of mind, especially if your vent system is complex or hard to reach.
Cost Comparison
- DIY cleaning: Expect to pay around $20 for a dryer vent brush kit.
- Professional service: This usually costs between $100 and $200, depending on the complexity of your vent system.
Safety Precautions During Fall Dryer Vent Cleaning
Here are a few key safety tips to keep in mind while cleaning your dryer vent this fall:
- Disconnect power and gas: Always unplug the dryer and, if necessary, turn off the gas supply before starting.
- Wear gloves: Keep your hands safe from sharp edges inside the vent system.
- Handle tools with care: Make sure you don’t accidentally damage the vent or dryer components during cleaning.
Preventing Future Clogs in Your Dryer Vent This Fall
After cleaning your vent, take these steps to prevent future clogs:
- Clean the lint trap after every load: This will reduce the amount of lint that makes it into the vent system.
- Inspect the vent regularly: Keep an eye on lint buildup and clean the vent when needed.
- Use the right dryer settings: Over-drying clothes creates excess lint, so choose the appropriate settings for your load.
Usual Mistakes to Avoid When Cleaning Your Dryer Vent
While dryer vent cleaning is relatively simple, there are common mistakes to watch out for:
- Skipping the outdoor vent: Most lint accumulates here, so don’t forget to clean it.
- Do not clean behind the dryer: Lint can gather behind the dryer and restrict airflow.
- Using improper tools: Be sure to use tools specifically designed for dryer vents.
How a Clean Dryer Vent Improves Energy Efficiency in Fall
When you keep your dryer vent clean, your dryer works better, especially in the fall when you use it more often. It dries your clothes faster and uses less energy, which helps lower your electricity bills.
Things To Remember
Cleaning your dryer vent in the fall is easy and important to keep your home safe and ensure that your dryer is working well. You can either do it yourself or hire someone to help, but doing it regularly will help prevent fires and save money on energy bills.
If you need help, Appliance Cowboys can clean, fix, and maintain your dryer vent. Their skilled team will make sure your vent is cleaned properly, which keeps your home safe and your dryer working longer. Besides dryer vent cleaning, they also repair other appliances, so you can count on them to keep everything in your home running well all year. Appliance Cowboys is a great choice to help keep your appliances in top shape and your home safe this fall.


